The weekend was rather slow on the front of airplane construction. I could make all kinds of excuses but the truth is that I just wanted to enjoy myself on my birthday weekend and so I did. On Saturday I wanted to go flying and just when I was rolling to the run-up area I saw my friend H.L. taking off in his sleek Eurofox. Over the radio I found out that an event I was missing out on for years (years in which I was still flying PPGs, powered paragliders) was happening just now, the Arizona Flying Circus event, hosted by the Motown private airstrip (5AZ6) in Maricopa County. As I didn't have anything planned but to get some time on the Hobbs meter, I checked my fuel level and the distance and headed there. I didn't have my camera with me, so now I can't provide any photos but I can assure you that the event looked like a lot of fun. I just wish my knees would be 10 years younger and I would have probably brought my own gear to fly there.
On Sunday, I spent a little time in the shop to look ahead. As I had messed up the step support angles by cutting off part of the flange on all four angles instead of just two, I cannot finish this section of the build and it seems that most of the rest of section 21 is related to the steps. So I picked some support tasks from the next manual pages, i.e. dimpling holes, installing nutplates, etc. to keep me a bit busy. I didn't spend too much time in the shop though as my wrist finally is getting better and I didn't want to aggravate it again. I guess those two days of easy labor and one whole day off might have made the wrist this happy.
Monday will probably be shop time again but I have to see what else I can pick to do while waiting for the replacement angles to arrive. I might have to start on the forward fuselage (firewall) with section 22 to keep me busy or I have to go back to section 10/11 and fit some of the fiberglass parts to the rudder and vertical stabilizer... We'll see.
Sunday, January 30, 2011
Friday, January 28, 2011
Finish Kit Arrived
At 3 PM the FedEx truck came by and backed into the driveway, dropping off a huge box containing the Finish Kit. I had organized a second furniture dolly to support the at 280 lbs rated box and to more easily move it around the patio.
The box hardly fit through the access gate - something I will have to keep in mind before building a plane too big to fit through it to get outside the backyard!

The dollies made it easy to maneuver it to the temporary storage area next to the tailcone.

The contents were in good shape as was the box itself. It put up quite a fight before I could take the lid off.

When taking the parts out to do the inventory I noticed something about the tank skin that looked odd. Does the top of the skin really have this little bend in there or is this a creased skin?? I wouldn't think so if the bend was going from one corner to the opposite corner but it just falls short 2 inches to do that... Looks a bit odd to me. Any comments? Don? You just inventoried your finish kit, did you see this too?

The inventory is still ongoing. I was too tired to go through all the bags and count bolts and nuts and washers. Maybe I do that tomorrow ...
Belly Skin Riveted
This morning I finished riveting the belly skin. Setting the rivets didn't take too long ...

... and shortly thereafter the skin was completely riveted.

I found another mystery hole though. In the area of the pulley bracket there appears to be one hole in the skin that shouldn't be there. There's nothing behind it and it isn't even shown in the plans. I left it open for now until I have determined if it really is an unused hole.

Then I prepared the next section, cutting apart angle parts and made a mistake. I was obviously thinking about the soon to arriving finish kit and didn't pay too much attention to the text in the manual. So I overlooked that it said to only cut the flange of two of the four angle that will be used for the step supports. I have a replacement part along with more fuel line (a suggestion from previous builders) on order.
This will give me a little break that I will use to go flying tomorrow before a little bad weather system is going to touch our area.
Thursday, January 27, 2011
Belly Skin Halfway Riveted
Tonight it was time to get the rivets seated for the first riveting session. There are quite a few holes on that skin and some of them I wasn't sure if I should put rivets in them as there was nothing on the other side of the skin. I decided to leave them open for now until I understand what is supposed to go in that space. I can always rivet them later if they are really not used but drilling rivets out on a skin with nothing behind it might show later.
Ready to get started on the riveting.

A bit more than half of the holes are filled and I removed all the clecos on the skin before my right wrist that is still bothering me finally gave me serious signs of warning in the form of sharp pain to remind me that there is something else to do after a long day at work and two more hours in the shop. For instance, sitting in front of the TV and cooling the wrist with ice. And that's just what I did.

I'm not sure if I can finish this tomorrow as I'll have to move things around on the patio a bit to make room for the finish kit that is supposed to arrive some time between 2 and 5 pm. If the guy comes by early I'll be doing the inventory, if he comes by late I'll be riveting the skin. There's always something you can do ... :-)
Wednesday, January 26, 2011
Finish Kit Delivery Scheduled
I received a call today from the shipping company delivering my Finish Kit. It's scheduled for Friday afternoon, which is absolutely perfect as it is my birthday and I couldn't think of a better gift. That is if it is undamaged and I wouldn't have to do inventory soon thereafter. Oh well, I'm a bit weird, so I probably am going to enjoy even this part.
Belly Skin Clecoed
I spent a long time in the shop today. In fact it was such a long day that I was too tired in the evening to write up this entry and the only way I could get this in was to travel back in time and write this up the next day.
So, I riveted those forward corner skins in place that I hadn't prepared before I needed them. This NAPA 7220 primer is a really nice product for a rattle can primer. The green zinc phosphate stuff I had before from Tempo (A-702) was not worth the money or the effort to put it on. Even on scuffed surfaces (SB pad) it wouldn't stick enough for the primer to stay on during handling. Really useless stuff. So that's why I got the NAPA stuff a few days ago.

Anyway, the corner skins were a matter of minutes and then I had to work on the belly skin. I deburred holes and edges and broke the side edges for a slight inward bend.
Then I dimpled the nutplate attach holes and, guess what, put the nutplates in. There were 20 of them and it would have not so bad if that belly skin would be a bit more easy to handle. The thing is huge and getting that monster pneumatic squeezer (did I mention: heavy?) in the right position over a flimsy little AD3 rivet is a bit tricky when you have to handle a wobbly skin at the same time.

Well, with drilling out only one messed up rivet I finished this job as well and then threw the belly skin onto the fuselage structure. Wow! This thing looks and more and more serious now.
Clecoing the skin on was just a time effort as there are indeed a lot of holes. When putting the outside skin stiffeners on, I noticed that they were actually different pieces. When I cut them apart I didn't pay too much attention I guess as I hadn't noticed this before. I also primed them all on one side only (the side I intended to put on the belly skin) and I turned out to be 80% correct. 2 of the 10 pieces were pieces were primed on the wrong side. This is pretty good considering that I didn't even know they were different and that I had to go on in some specific orientation.

If you intend to prime these between the belly skin and the part itself, then I suggest you mark them when cutting them apart - preferably on the side you're not going to prime. That way you'll see the markings when putting them on.
And that was it. I'll start the riveting action that lies ahead next time getting to the shop.
One thing bothered me today though.
There was this option mentioned on the page but no details or explanation was given as to why someone would maybe like to go the optional route of adding 4 more nutplate around a mysterious hole that will later obviously get covered up. The nutplates might provide some access to this hole but without knowing what it will give access to later, it is almost impossible to make an educated decision. Does anybody know what this is for? Dave?

Not that I would like to rivet MORE nutplates but at least I'd like know what I'm missing out on...
Tuesday, January 25, 2011
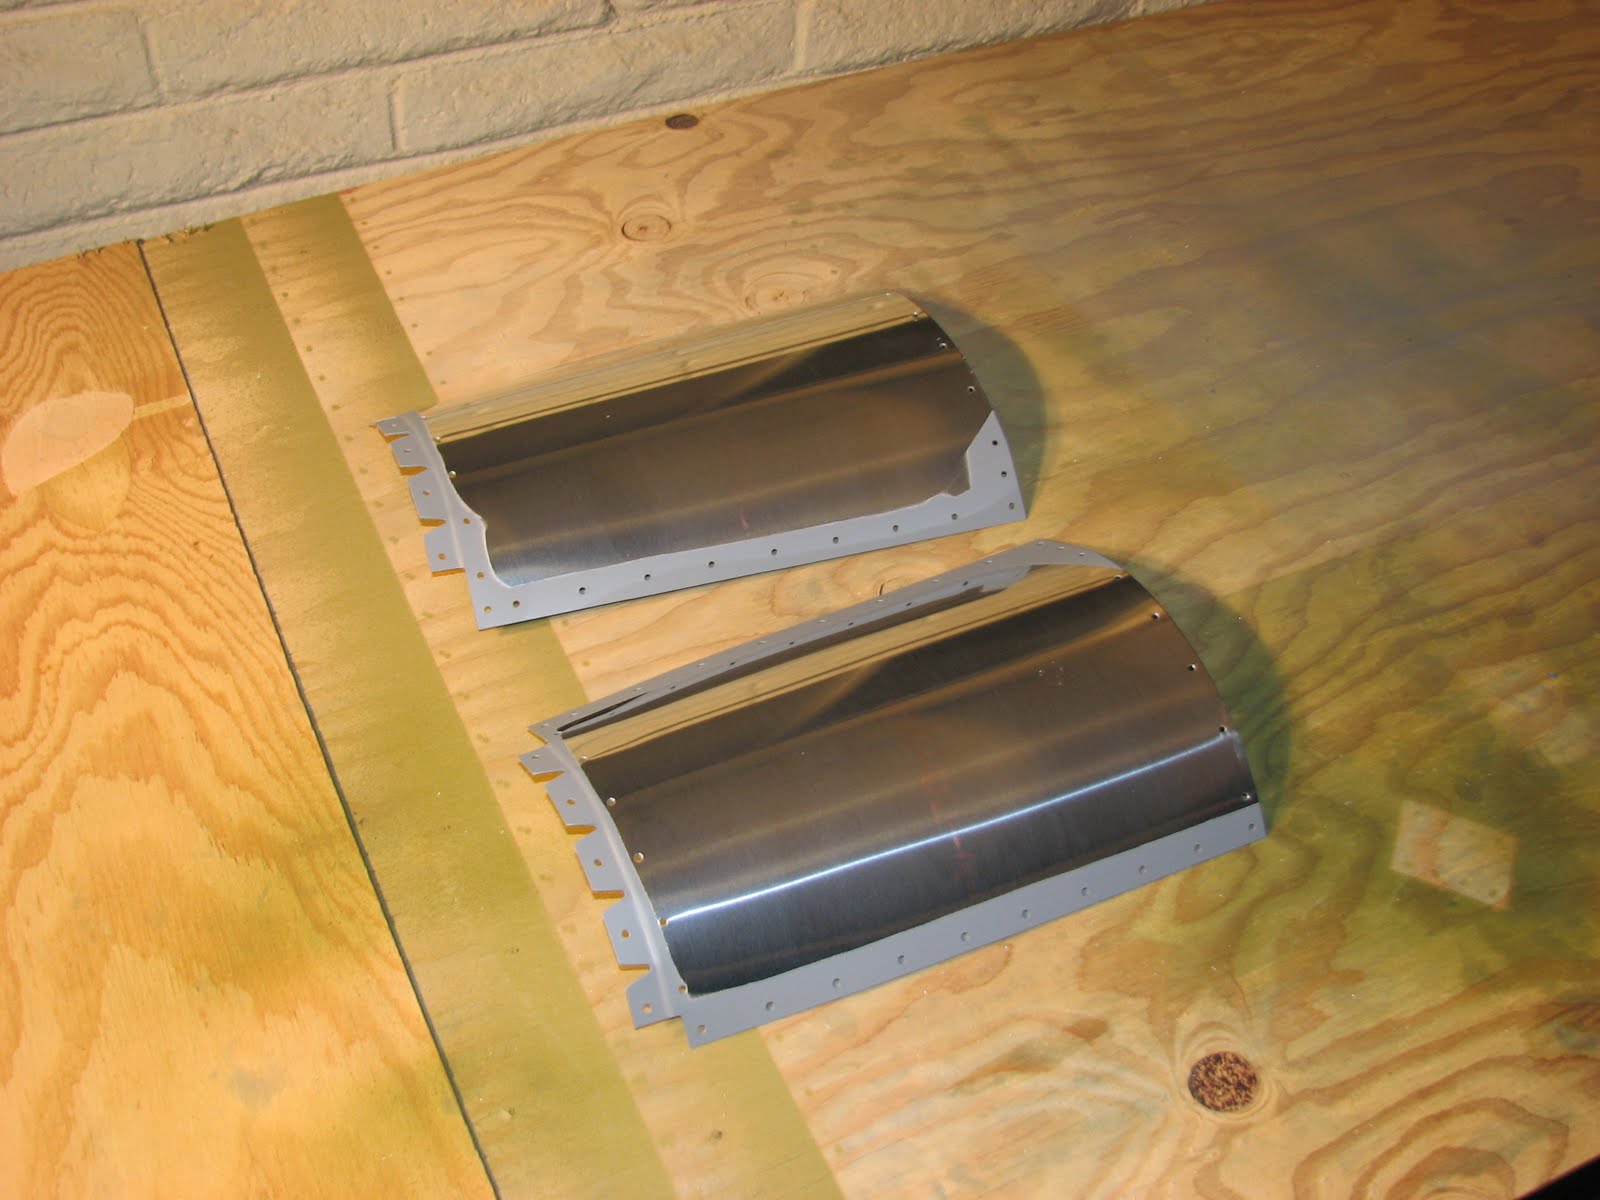
Corner Skins RIveted
I installed the snap bushings and, most importantly, one of the fuel line fittings that is sitting so close to the belly skin that installing this one in section 28 where it was supposed to get done is a pain to then but pretty easy right now. I had to file off the washers to allow clearance to the flange of the bulkhead. Still the access to the nut was so restricted that I could hardly get a wrench head on it to torque it enough. I have no clue how others did this task AFTER the belly skin was on. Do yourself a big favor and do it before putting the skin on!

This was the close up showing that I am really afraid of that nut getting loose again. And here is the overview shot.

Then I clecoed the gills on, or correctly called the Fuselage Corner Skins.

Figuring out which holes to rivet and which not took longer than the actual riveting action.

Naturally, I did all this stuff on both sides at the time. Here's the proof:

And this would have been a pretty complete job if I hadn't overlooked one pair of the corner skins. So, I hadn't deburred and primed these over the weekend. I was able to locate them though and I deburred and quickly scruffed and primed them with NAPA 7220 and let them sit over night.
Monday, January 24, 2011
Fuselage Turned Upside Down
Tonight I riveted the seat skins on and put the control column in the heart of the fuselage, torqued the screws and torque sealed them. After reading Dave's blog I had prepared myself for doing nothing but this as fiddling with the washers and the bolts of the control column was about to take significant time. Surprisingly, securing every bolt took me about 5 minutes each and I didn't even have to use tape as an aid. The AN960-10 washers (I did not have to use any 10L for proper fit) fit perfectly and snugged right under the steel arms. With the help of some fine tweezers this was accomplished without too much hassle and I only dropped a pair of washers once.
Here are the seat skins in place.

Then the first bolt was successfully secured.

Shortly thereafter the second bolt was in and all that was left to do was to torque the bolts which took actually longer than fiddling with the washers because I didn't have the right extension piece to conveniently get to the bolt head.

This surprisingly short task made it possible to get further forward with the build that I hadn't expected to do tonight. So, I thought I throw in one of those rare photos of the builder setting some rivets ...

Oh, and please politely ignore the mess in the background. It is actually very organized but might appear a bit confusing to the untrained eye ...
So after more extensive use of the Avery wedge tool I had those 1212 ribs riveted to the seat bulkhead.

This included dimpling some specific holes, too. Please note that my dimple dies had a hard time on dimpling the upper flange on the inner two ribs in this photo. The flange is so short that the die doesn't have enough room and it bent the flange a bit outwards. I was able to correct that by bending it back with my hand though.
The next step was to just CLECO the next and possibly last bulkhead to these ribs. I believe that the next "bulkhead in front of this one is going to be the firewall. Now, the structure had to be turned over upside down to allow easy access to some of the holes that require to get some snap bushings.

At this point I received a friendly call from my beloved wife who had dinner ready and so I quickly cleaned up and called it a night.....
.... to eat this:

Yummy! What a treat after a successful night in the shop!
Sunday, January 23, 2011
Forward Floor Parts Primed
Yesterday and today I worked on the forward (lower) floor parts, as aopposed to the forward floor parts I'm going to sit on. Yesterday I did my share of deburring, today I prepped and primed the parts. Please note in the following picture how elegantly I put the curved side skins over the forward floor bulkhead. If you look hard you can see the flange of it under the most right belly side skin.

That also included some small stiffeners that will go onto the belly skin.

And it included the landing gear tunnel. Unfortunately, I forgot to take the shoot when the fuselage was still sitting outside on its side where I painted it, so I had to do a tunnel shot when it was back on the work bench. Did turn out nice though.

The only exciting thing that happened was when I was mixing paint. I had planned to use up the EkoPoxy when spraying the tunnel and use what ever was left over for other parts. Well, that didn't turn out so well. I was mixing it the usual way, pouring all the rest of the paint in the mixing cup. Around 330 grams - that's when I had a short thought of "I hope there's enough activator left to mix this with" but I wiped that away cause I thought a reasonable company would never give you too little of the activator for the paint, right? The necessary amount of activator was 330 grams / 5.6 = 58.9 grams. When I poured the rest of the activator in the mixing cup the scale showed only 28 grams. Way too little to even think about spraying this paint. So, in lieu of more activator I had to toss out the whole batch. Bummer that as the quart sells for $50 and I just tossed a third of that because of a few grams of missing activator. I wonder what went wrong the two times before though, as I would think they would provide a well measured pair of components that you can use up completely. With the 28 grams of activator I would have still had 173 grams of paint left over that would be unusable. That seems to indicate that I had used too much activator before but I used the same gram scale and I was very diligent when mixing the components.
Hm, I think I contact Stewart and see what they say ...
Friday, January 21, 2011
Seat Bulkhead RIveted
Tonight I started by riveting the 17 nutplates on. Amazingly this didn't bother me at all. It really is a blast to work with the pneumatic squeezer. Once set up the rivets are quickly squeezed and all turn out literally identical. That's what makes the number of nutplates install so easily. I also installed the bulkhead doublers which rivets get half way pulled and half way squeezed. With the the squeezer that job was a few minutes of non-fatigue work.

That was the last work on the bulkhead assembly before the seat bulkhead was actually supposed to get riveted to the seat ribs. So I clecoed it on and made sure that I chose the correct rivets for every hole as I didn't want to repeat yesterday's drilling frenzy. Then I quickly riveted the bulkhead on, no big deal as all the rivets were of the pull type.

And from the rear view.

Finally I just pulled the parts form the next steps out so I get a chance to deburr and prep and prime them. Hopefull I can do that during the weekend so I'm not running out of work during the week. But then that might be a nice change to get some days off ...
Thursday, January 20, 2011
2 Steps Forward and One Back
I must have been very tired tonight from all the building earlier this week At least that's my excuse and the reason for this headline. I messed up a few things and was drilling half as many rivets out as I pulled, that's how it felt. And then still I've overlooked something in the manual but I am not going to correct this, I guess, but I'm getting ahead of myself.
I started the night by riveting those bearing brackets for the control support that required double-flush rivets. The pneumatic squeezer did an impressive job on those. The shop head is almost completely flush. Less than 1/32" is protruding, I hope that's good enough. This shows the shop side.

Then I riveted the doublers on and this is where I made my first mistake without even noticing until now. The manuals have a bold note saying that you should put the manufactured head of the rivet on the bulkhead whenever possible. Well, it was possible here but I chose not to do it because it looked prettier. Grmbl!

When I found out I immediately checked with Dave's blog and saw that he did the same. As he didn't say anything about it he might not even have seen the note. More importantly though, it appears that he didn't run into an issue with this either, so I am going to leave them in. The reason for this note is clear to me. The bulkhead is relatively thin and the forces to build the shop head are quite high. So if all of the shop heads are on the bulkhead then the bulkhead will bend slightly and this will later be a struggle to put the skins on which will very likely only be possible by applying a lot of static force. Not good. I'll keep an eye on the shape of the bulkhead. If it appears bent before putting it on the ribs, I'll drill those rivets out and put them in from the other side.
When finishing the bearing bracket I made another mistake. I quickly put the pull rivets in and pulled them all. Then I thought - Oops - those brackets are quite thick! I wonder if the LP4-3 are long enough... maybe I needed LP4-4... Sure enough!
I drilled them all out and replaced them with the longer version. Getting them out was unusually hard as the rivet had almost disappeared in the hole when the shop head was built. And so it wasn't enough to just drill the head off, I really had to drill the whole thing out. Fortunately, I did it straight and no hole was elongated or widened.
Fitting the stub spar receptacles was not necessary, a little bit of Scotchbrite polishing was enough. Then I riveted those on. No mistakes there. Yay!
When riveting the flanges of the doublers to connect them I followed the option Van's made in the manual and squeezed them with two flat head dies. The simple reason was that I don't have a cupped die for AD3 rivets. We haven't used this size with cupped heads in the whole build until now and I don't have dies for that in my toolkit. Dave was wondering why Van's was so generous and he didn't understand what that option would have given him. Well, obviously he had those dies that are not in the list of recommended tools, I suppose.

Finally, I riveted the bearing brackets to the bulkhead. Initially on the wrong side. Sure! Well, after drilling out another 12 rivets I fixed that and also squeezed the nutplates on, the ones with the screw hole on one side.
The manual suggests to first rivet the brackets to the bulkhead and then to rivet the nutplates on the sloped flange. I didn't follow that order as handling the bulkhead with one hand while squeezing the rivet with the other is awkward and the process is way easier when the part to handle is light and small. So I put the symmetric nutplates on first.

I'm on page 21-12 now and the next step was to rivet a two digit number of nutplates onto the bulkhead. That's when I seriously felt like I wanted to call it a day ...
Wednesday, January 19, 2011
Seat Assemblies RIveted to Center Section
I started by clecoing the two finished seat assemblies to the center section, starting with the upper flange as this was what I had easy access to.

Then it dawned to me that it will get a little tricky to get to the bottom of this. Partly because the seat assemblies are all wobbly with just the upper flange being connected to a solid structure and partly because this thing now became pretty bulky as well as heavy and not easy to turn over just like that.
I thought it to be the safest way to first turn it on its side, stabilize it there and put some clecos in the bottom flanges before turning it over completely for riveting.

That was a pretty good idea except that the structure wouldn't stay on its side by itself. A box with 500 230 grains bullets placed on the side flange of the wing bolt thingy fixed this issue.
I put the bottom clecos in and turned this monster upside down. to rivet the bottom holes. I remembered a discussion on the forum that was talking about how to correctly rivet the rear floor ribs to the center section and the important part was to put the manufactured head on the center section, inside the landing gear tunnel to allow for enough space to later insert the landing gear into this tunnel. As it didn't appear to much more convenient to do the forward flanges any different, I just riveted all of them from the tunnel again, using the PRP26A close quarter riveter. Yes, all those rivets were pulled manually. I sure feel like Popeye now!

Considering how awkward the access to the forward rib flanges would have been (using the wedge tool on every single hole), I think I didn't lose too much time going manual here. Pretty quickly the job was done and I could turn the structure over again to rivet the top flanges.

The top went very fast. Except for the outer 4 holes using CS4-4 rivets there was nothing to look out for and so it soon looked like this.

For the last step you have to look closely as the difference is hard to spot. I put the bracket on the inboard sides of the wing bolt assemblies and marked the bolt on the bottom that holds the plastic rollers with torque seal.

That ended the day for today and took me just two hours of shop time. Not bad. I'm just at 50 hours into the section 21 now.
Second Thoughts on Painting
The more I am working with different primers at different temperatures and humidity levels the more I am getting second thoughts about painting my RV myself.
It's not just that I don't have a good place to paint at yet it is also a question of experience. With all the spraying I have done so far I have learned one thing about it. Painting is an art and requires a lot of experience to be done properly. Having a dusty and insect infested area doesn't make the job easier.
The idea of doing the painting myself mainly spawned from a desire to reduce the overall cost of the build and only partly came from a pride thing. I believe a commercial paint job is in the area of $6000 and above if it's a fancy paint scheme. The paint scheme I am considering doesn't require a lot of masking, so I will probably be closer to the six grands number. If you consider the money you have put into the build by the time you get ready for painting, this is about 10% of the overall cost. That doesn't even account for all the effort, labor and hardship your were going through to get to that point. But then the paint job is what you are going to see every time you go for a flight. It is what everybody else is going to notice first when looking at your plane and finally it is also what a potential buyer is going to be impressed by (or be drawn away by) when checking your ride - if you'd ever consider selling it.
So, I am wondering if I could live with a paint job turning out as bad as some of the primed parts look like in finish. I tend to spray to light to keep the weight down which then results in horrible orange peel and a rough looking surface.
Therefore I'm leaning towards doing a trial run on this whole endeavor and this is going to be painting the interior. If this one doesn't turn out as I want it to look like I can still opt for the carpeting solution and cover up most of the mess with some noise dampening and glare reducing carpet. If it turns out good though, then I might know what it means to paint the whole exterior of the plane and I will have more knowledge to make an educated decision.
As my fuselage build is getting close to the point where I wanted to paint the floor section, I better get on building the tent I was going to do this in, so I'm getting held back in the build when I reach that point.
Tuesday, January 18, 2011
Forward Floor Parts Assembled
I spent three hours in the shop tonight assembling the two halves of the forward floor. And now that I am typing this and looking at the pictures again I realized that I was getting too tired to do complicated stuff and sure enough made a mistake in setting one rivet where the hole was supposed to be left open. Ah, well, I will just have to drill it out tomorrow.
So, I started by match drilling the seat back hinges to the floor boards. This task is unnecessarily tricky on one side as the matching hole is one the same side for both sides. If they were mirror images of each other it would be easier to get a clamp on the opposite side of the clecoed hole to hold the hinge in place when drilling. The first hole on this tricky side will have to get drilled while you hold the hinge down with your hand long enough until the drill has settled. Maybe you find a better way, it worked ok for me.

This picture shows the tricky side as the matching hole that gets clecoed first is on the inside of the floor board. The only side that would have been easy to put a clamp on.
Both hinges turned out fine though.

Then those hinged floor boards got riveted onto the pulley bracket assembly and the flaperon mixer assembly respectively. Please note the one cleco on the left side that has the blue tape on it that says "don't put a rivet in this hole". When I was doing the other assembly my brain got fuzzy and didn't put this reminder on. And sure enough I saw an empty hole and filled with a rivet. Duh!

And after riveting there is a line of four holes from the outboard side (down left in the foreground).

And after finishing the side with the pulley bracket assembly, there is a row with only three empty holes from the outboard side (down right in the foreground). The rivet right next to the seatbelt bracket has to be removed.

And then, after finishing those two floor halves, I put them in the position they will get riveted onto the center section, probably tomorrow evening. Thereafter the temperature better get a bit higher because I will have a very hard time getting around this fuselage part in my shop and will want to put it outside again. We'll see how that's going to play out.

Monday, January 17, 2011
Floor Boards Prepped & Primed
I did a lot of prep work today, not just for the metal surfaces. I also worked on the forward floor bulkhead and dimpled and countersunk all required holes and opened up the holes on the very bottom to the required sizes. The same is true for some small parts that will soon be assembled.
Yesterday I just did some more deburring and devinyling to the get the parts ready for the prep and prime session of today. Denny Myrick with his gorgeous RV-12 finally made it out to Marana and we had lunch and another flight. I think my RV-12 time is now at 1.5 hours and she really feels great. I hope mine will turn out flying that nicely!

So, this morning started in the shop getting all the little things out of the way to start a successful priming run. Then I started prepping the metal with the trusted Cortec-440.
I took a short lunch break while the aluminum was drying and then I shot the primer. Two different sessions actually as I wanted to put epoxy on the floor boards for more durability - one side only. And the rest of the parts should get the easier one component primer from Stewart.
Here's the forward floor bulkhead after all the little hole treatments had been done.

The EkoPoxy takes some significant drying time so I shot that one first until out of paint and then cleaned the gun and refilled it with EkoPrime this time. After a few hours this was the result.

The floor boards that I had shot first were drying on another rack.

After cleaning up all that mess I had a bit of time left and started preparing the back rest hinges. Do NOT TRUST the manual when you cut them. The manual says to cut a 20" piece off the hinge material, then pull the hinge pin and make 4 10" pieces out of that cut according to a diagram. If you try to make the 4 pieces look like the diagram you'll end up with one piece that can't be matched to the loop pattern or will be too short.
The correct way of doing it is to cut a 20.5" piece off of the hinge material and then do the rest as described in the manual.
This is how it should look like when done properly.

I also drilled the matching hole in them and drew the center line on the back of the hinges but I forgot to take a photo as I just realized. Oh, well ...
So, It looks like I'm ready for some nice assembly work in this week's evenings. Stay tuned ;-).
Subscribe to:
Posts (Atom)


