My start on section 15 is slow - very slow. First I was put off by the idea of having to start the deburring of the nose ribs before I could do anything and there are 28 of them.
Then when I started to bite the bullet and start the deburring I noticed that the edges of these ribs are really rough and they are eating up my little 1" Scotchbrite wheels in no time.
Well, finally, I found back to my helpful stoicism and I stopped thinking about all this. I finished 6 ribs in about an hour of mind-numbing deburring work, so I predict that in about 3 more hours I should be through the stack of nose ribs.
A bit later there will be 26 main ribs, but I try not to think about that!
Thursday, September 30, 2010
Sunday, September 26, 2010
Section 14 Done
Today was meant to be a short day. I started picking things up where I left them the night before. The flaperon hinges. I was very careful about aligning them correctly with a little bit of inward tension to keep them in contact after riveting. It turned out to be quite a nice riveting job.

More importantly though, the hinge flanges didn't separate from the inner part and the bearing didn't seize either!
Then these hinges got riveted to the doublers and those then got riveted to the rear spar. Here's a photo of one side, including the outer flange bracket attached to the opposite rear spar.

and here's the other side:

And that was the end of Section 14. Believe it or not, once you get over the time consuming countersinking part it rivets away pretty quickly. Over all, including the priming job, I spent 21 hours on this section.
And while I was preparing the next section, my wife caught me unwrapping a new set of "toys", as she calls it.

Do you want to know what I was thinking about while I unpacked this one package of nose ribs?
Yeah?
It was: "Do I really want to scrub and prime all these?" ...
Saturday, September 25, 2010
Priming Done, Riveting Started
It took me another day until I could get to prime the parts of Section 14. Work was crazy and the air still humid, so I didn't want to carve out day time to do this.
So today in the morning I started the priming and all went well. I also did not forget to stack up all prepped parts and weigh them before and after the priming. The stack of weighable parts (everything but the rear spars) came out at 1411 grams (yes, grams! I don't see why you should come up with fractions of an ounce when there is a unit that has a reasonable resolution to so the job).
All this came out at 1411 grams:

After two hours the parts looked like this and formerly weighed 1411 grams was now at 1436 grams, a difference of 25 grams ( yes, I waited a few hours to let the parts dry before weighing them) or 0.882 ounces or a little less than 23/256th of an ounce.

So, the weight increase was about 1.77%. While this is particular to the combination of these parts as the weight increase is certainly a function of surface area (which I was too lazy to calculate), on average this should be a reasonable number for basic parts that are not skins or ribs (as these have a low weight but a huge surface area).
If I would apply the 1.77% to the advertised empty weight of the finished product of 740lbs, I get 753lbs primed. I think I saw 755lbs reported on the Van's Airforce Forum for one that was completely primed on the inside. So, I assume this is a good figure for the estimate.
After the primer had fully dried, I started the fun part of this section and went on to assemble the hinges.

This is how they looked after priming. Now, I remembered from the early beginning in May when assembling the hinges for the rudder that the COM3-5 bearings are very sensitive to primer dust inside their milled seating area. So, I went ahead and scraped the inside of the hinge flanges clean of primer.

I also remembered to bent both flanges a bit towards the inside so they would open up and leaving an ugly gap when riveted.
Then I noticed that I haven't been riveting delicate parts like hinges for quite some time so I figured it'd be best to get some squeezing practice on something else that's not so unforgiving. The flaperon hinge brackets seemed to be a good candidate for that and sure enough it turned out to be a nice practice.

The I decided to increase the challenge a little by riveting the doublers onto the nose stub spar. This included riveting countersunk rivets in doubly countersunk holes in order to get both sides flush. I felt the suggested rivet AD3-3 was a bit too short to really provide enough area in contact once it was seated. I tried a 3.5 that sure enough was a bit too high when the squeezer applied all the force it could but it was filling the holes much better. I decided to use a punch and a sledge hammer to set rivet deeper and using the concrete floor of the workshop as an anvil turned out to be an excellent job. I used 3.5 rivets on the other spar doubler inboard are exclusively.

Oops, that was the pretty part. Here's the inside:

The primer suffered a bit but the surface across the rivet is now completely smooth AND the shop head fills the countersunk hole completely.
Well, finally that all left me with not enough to really start on the hinges but I at least clecoed them and fine adjusted them for proper alignment. It is probably a good idea anyway to start riveting a delicate part like in the morning...

Thursday, September 23, 2010
Prepping Done
No photos today, but I got done with all the prep work with Cortec VpCI-440. 3.5 hrs of scrubbing and washing off aluminum. I'm done for today.
Before I prime this time I want to precisely weigh the parts and see how much the primer is increasing the weight. I hope I don't forget doing it!
This section is almost ready for the last chapter as I am getting close to riveting now.
Before I prime this time I want to precisely weigh the parts and see how much the primer is increasing the weight. I hope I don't forget doing it!
This section is almost ready for the last chapter as I am getting close to riveting now.
Wednesday, September 22, 2010
Ready for Prep-n-Prime
I was transitioning to night shift again and had the whole day to deburr edges and holes and countersink a few holes and get every part of Section 14 ready for prepping and priming. Sure enough it was raining today and the humidity was high, so no chance to get an early start on shooting primer. I took easy and focused on doing a good job on the deburring instead.
The only odd step in dealing with the hinge brackets was that they are supposed to get countersunk on both side of the same hole, which I assume to mean that the manufactured head will have to fill the countersunk area and that the rivet is supposed to not protrude beyond either side's surface.

After about 4 hours I was done with deburring and had created a nice little stack of parts that need some primer on them:

And the rear spars got finished too

Tomorrow I hope to get at least the prepping done.
Tuesday, September 21, 2010
Spar Stubs Countersunk
With the previously described new method it took me about an hour to finish countersinking the other spar stub and everything went extremely well. No vibrations or anything else messing up the holes., So went on and deburred those spars as well, getting them ready for the upcoming priming frenzy.
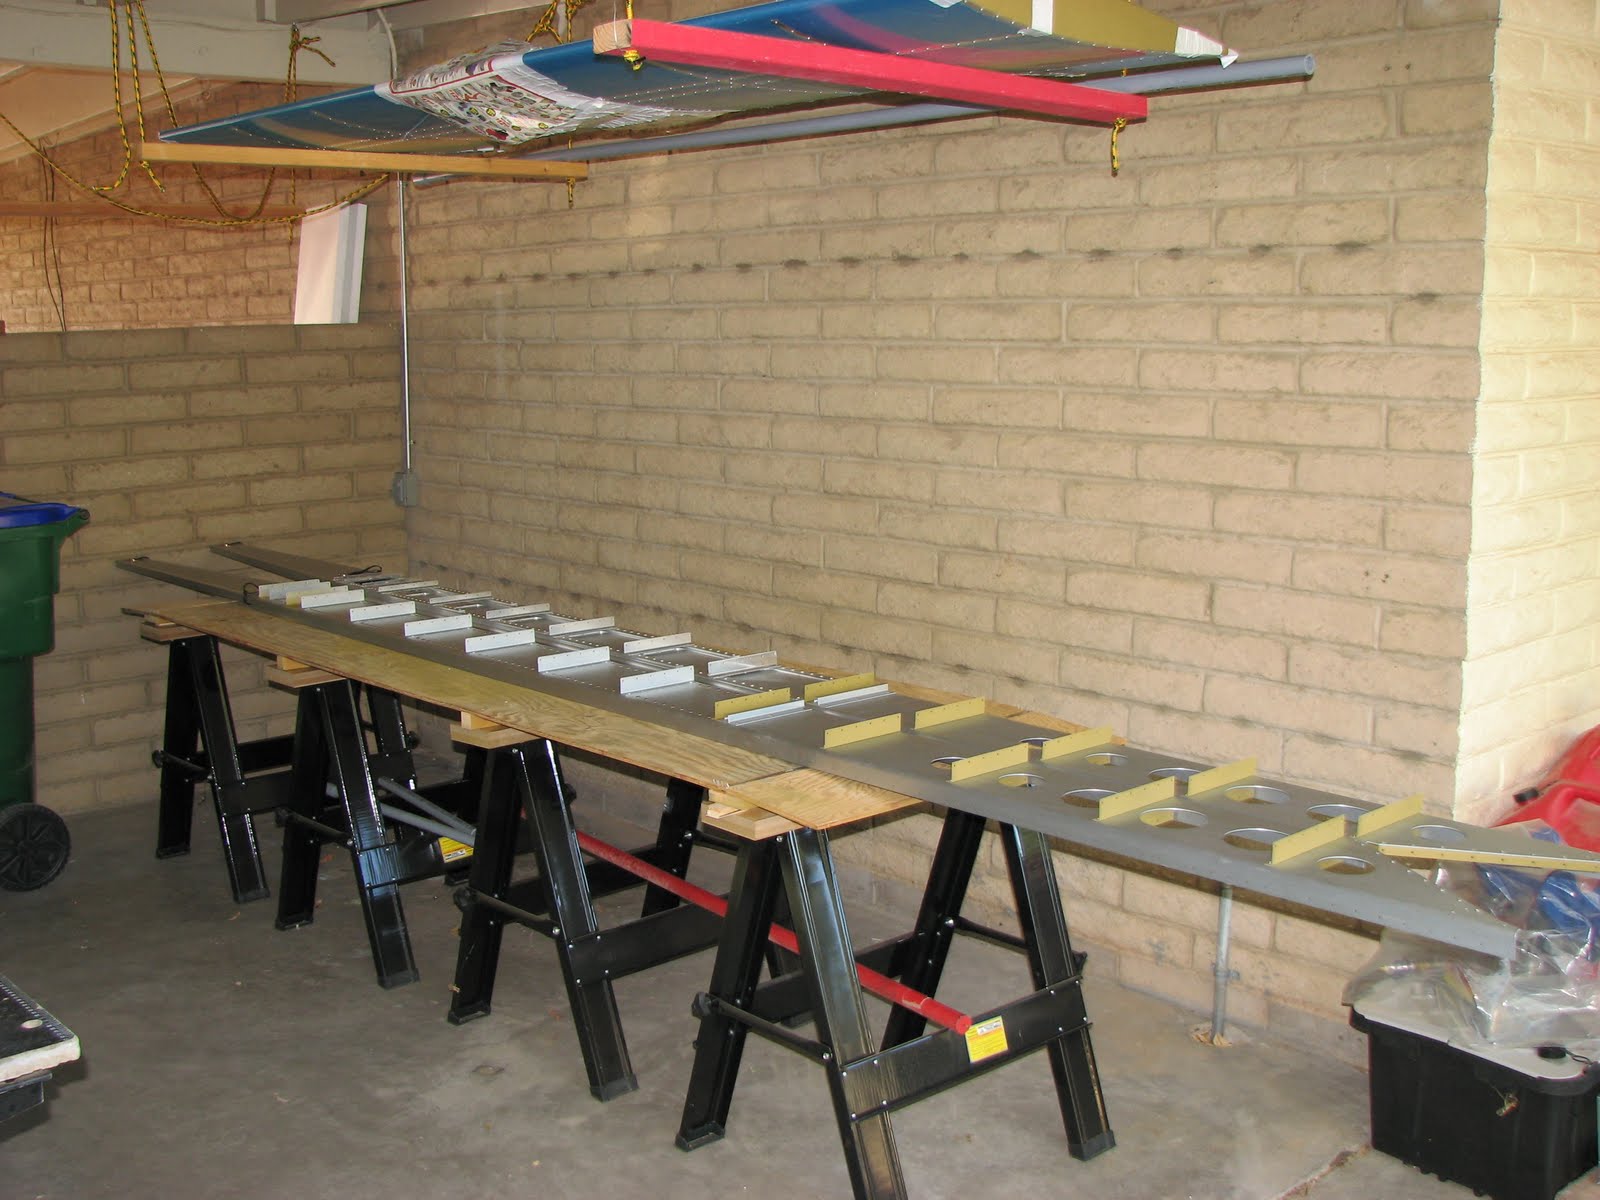
The blank parts are ready for prep and prime, the vinyl covered ones are yet to be processed.

The blank parts are ready for prep and prime, the vinyl covered ones are yet to be processed.

Sunday, September 19, 2010
Countersinking Spree
I was so enthusiastic about completing Section 13 so quickly that I somehow expected this to continue just like that. Well, I had an awakening of some kind right in step 2 or 3 on page 14-01.
One of the reasons I couldn't start as early as I wanted on section 14 was this:

This beautiful bobcat was sitting right next to the shop entrance and wanted to take a nap, so I backed off and let her be. I love cats and wild ones even more, so I wouldn't do anything to make them feel anything but welcome....
Half an hour later she found a better spot and was gone, so back to work.
The job was to countersink (120 deg!) the outer side of the leading edge reinforcements that later get attached to the inboard side of the nose ribs. The skins in that area will get riveted on with CS4 rivets. Why that is I'm not quite sure as all the other skin rivets have a domed head. How this is going to be smooth I don't understand either as the holes in the skins are not going to get dimpled except for two on the outboard side of the skins. You see all that later in section 15. I can just assume that the particular way they want you to countersink this part (a bit deeper than you usually would) means that the force of setting the rivet will also do the dimpling and force the skin to bend enough to seat the rivet flush with the skin.
But that's in the future! For now, I had to figure out how to actually do the countersinking on a piece that cannot be sit flat on a surface to work on. The flange of this front spar is bent to match the curve of the skin in this area. I tried first to use my trusted electric screwdriver that I used before with success on parts that are flat. This worked OK until my arm got tired and I had a hard time to hold it perpendicular to the surface (that flange area is very small). I hadn't even finished the 28 holes on one flange when that happened so I had to think of something else.
I laid the flange flat on the edge of the workbench and moved the hole to work on just beyond the corner of the bench. Now I could press down straight and work as usual while my weak hand was holding the flange in place. The spar material is thick enough to withstand the force without bending or flexing. After doing about 3 or 4 of the holes with this method I thought that if I could just find a support with sharp and straight edges I could do this on the drill press and safe myself a lot of muscle pain. After all, the number of holes to complete this task is 112.
I found a V2A steel cube that with some extra support had a reasonable height to give the web of the spar enough clearance on the drill press platform and I tried it with good success. For a reason that I still don't understand, the countersink cage sometimes starts vibrating in the hole and then creates a larger countersink than what it was set to. This happened twice while using the drill press and it is announced by a sound of screeching metal. All you have to do then is to stop, apply a drop of Boelube on the hole and continue carefully. Unfortunately, I learned this after messing up two holes and sinking them too deep. Not too much to throw the part away but enough to be unhappy with the job, so safe yourself the grief and be careful.
After I found out how to use the drill press in this step, I was making a lot of progress and finished the second flange in record time and without tiring my muscles.
This is the result of 3.5 hrs of countersinking and trying different ways doing it.

Here's a photo of the final setup:


Tomorrow evening I'll try to do it to the second spar.
Saturday, September 18, 2010
Wing Spar Assembly completed
Oops, that went real quick! I started around noon today with the actual assembly work of Section 13 and - bang - I was done. After proving that the spars do fit in the shop and let me walk around them, I fired up the A/C as we another hot day of around 105 degrees and working on the spars in the shop sure makes this much more comfortable than having to work outside!

There's really not a lot to it. The section starts with drilling and tapping BOTH sides of the AEX tie downs that are already riveted to the spars. I guess they do it on both so you could lift the plane for storage in a hanger that has the required pulleys. I did it although I doubt I will drill the hole in the skin to give access to it as we don't have these kind of hangars over here.
I used my conventional electric drill for this job this time. It went very well as the drill has a very sensitive "throttle" and allows me to run it very slow.

Then on to the riveting! Just make sure you understand the confusing instructions and drawings correctly before pulling those rivets. It took me a while to get comfortable with the language again but after a little bit of investigation of the actual spar to work on I think I got it right. Make sure you find those 3 LP4-4 rivets that are on the inner side of the left spar. The rest is just LP4-3 everywhere. Some said they were slow on this part because they had to use the wedge tool for riveting a lot. Well, I didn't use the wedge once and I was done in less than 3 hours.
I used that little manual riveter that came with the Avery tool kit and I'm getting really comfortable with it. It gets in all those tiny places and not having to fiddle with the wedge, drop, pick it up, etc., seems to be faster. On the right side I discovered a good speed up that you might want to use.
When installing the outer Attach Brackets, cleco every other hole starting on the outmost hole, then pull two rivets with the little manual puller, remove the cleco and pull the three left over rivets with the pneumatic puller while your free hand is pulling back the bracket to give clearance. Worked great for me after I discovered that pulling back on the bracket doesn't deform it permanently. If I had done that on the left spar as well I think I had saved half an hour.
Oh, and while you're at it... If you think that riveting from one side it tricky, take a look at the other side and see if you can't get there easier. This is why you will see shop head and manufactured heads on the same side of the spar side by side. No one is ever gonna see the inside of the wing anyway...
When you install the clecos for the outer Attach Brackets it is easier to work on the spar when it's positioned upright. I used two pieces of 2x3 scrap wood and a clamp to widen the inboard part of the spar and allow it to sit secure on the sawhorse.

After clecoing it's easier to rivet when the spar is lying on its broad side again. Here's the result for the outer Attach Brackets:

The inboard part is a bit confusing in the instructions I think. Anyway, here are my results. If you think I am wrong, let me know. First the front of the spars.

And here's the aft view.

And that was Section 13. Hard to believe but true! Overall 9 hours worked on this section!
I put the spars outside again as looking at Section 14 tells me that there's more work coming up that needs me to switch between my two workbenches in the shop and the spars would be in the way.
Friday, September 17, 2010
Prepping and Priming the Attach Brackets
No fancy title today. I had time to work on the plane during the day as I was on transition to what we call evening shift. This is a couple of hours before sunset till around midnight, so I didn't have to be in before 4pm and I spent the day prepping and priming the 20 Attach Brackets and some other small parts that are part of the Wing Spar Assembly.
This work always takes more time than anticipated and there's not a lot to focus on, so my mind wandered off and thought about the number of ribs to prep, if I really want to fully prime them. I might change my mind on that, really...
This shows the temporary storage of the spars in front of the work shop (to the left). I wasn't sure if they would really fit in the shop AND provide enough space to walk around them with the door closed. So I stored them there and I found some deep scratches in the anodizing that I wanted to clean and cover with primer as well.

Here are the parts after the prep work with Cortec-440:

And here's the result after the primer went on.

and one spar got some treatment too.

Then I had to run to work to make it in time - as I said that prep and prime work always takes longer than you think....
Thursday, September 16, 2010
and the deburring starts again...
After I spent yesterday trying to understand the first steps and getting an overview of the upcoming activities and also trying to figure out where to store what and where to keep the crates for the fuse kit that is arriving soon, I got back into action today.
It felt like a deja-vu as the activities were well-known and consisted of separating parts, breaking edges and deburring. Now call me crazy but it felt real good doing this again. Sure this feeling will be replaced by fatigue and desperation soon but for now it felt real good to be back in the shop working on the plane and deburring those edges.
Because of that seemingly overwhelming number of similar pieces that have to be smoothened and groomed, I was briefly considering not priming all of this but the German in me won again. Maybe I have another fight tomorrow when I'm actually planing to do the prep and prime work but today he won.
Sorry, no photos of this step.
Tuesday, September 14, 2010
Inventory on Wing Kit Done
I'm getting really professional at unpacking subkits or there just weren't that many parts in this kit. Anyway, I finished the inventory in just two hours (at 100 degF) and I came out one screw short. It's pretty amazing that they do such a great job, although it also proves my point of why they not just add one screw of each kind to make sure they wouldn't have to spend $3 on shipping a screw that's worth about a cent or two. It would also be a kindness to the builder who sometimes drops a screw and has a hard time locating it in the mess he calls his workshop.
Oh well, I guess Oregon had a lot of Scotsmen coming over at some point in time...
Here are pictures of the two boxes before I started unpacking:


The long box is a bit more than 15ft long and with a little bit of creativity I might be able to get it into my workshop for the last hot days. I'm sure though that I will have to move the spar outside to put the ribs on ...
Wing Kit Arrived
Ah, the fabulous Fedex Freight man came by this afternoon and brought gifts. He even helped me maneuver those heavy crates to places on the patio where they wouldn't be in the way while I'm putting its contents together.
What a wonderful feeling to be back on track, studying the Oregonian plans and playing with shiny aluminum parts!
Well, back to the inventory ....
What a wonderful feeling to be back on track, studying the Oregonian plans and playing with shiny aluminum parts!
Well, back to the inventory ....
Monday, September 13, 2010
Wing Kit almost here
I just received the call from the freight company, they'll be delivering the Wing Kit tomorrow afternoon. Fortunately, I can do almost all my work remotely from home, so I'll be leaving work in the afternoon to be around.
Finally, I can continue building. I'm really excited!!!
Finally, I can continue building. I'm really excited!!!
Sunday, September 12, 2010
Considering an Alternative Engine
The wing kit is about to get delivered and so Van's charged my credit card with the outstanding amount. This black hole that was blown into my account made me open up my little spreadsheet to see again what else I will have to spend to finalize the RV-12 under LSA certification.
I'm not sure if I mentioned it here before, I certainly did in the Van's Aircraft Forum, but I'm not really happy with the avionics package that Van's chose for the -12. It might have been a nice set of electronics when they first developed it but this stuff is developing almost as quickly as computers (which they essentially are) and so by now there are much more capable alternatives on the market. I.e. a Dynon Skyview is much more attractive to me than the D180 Flightdek. Then I have the Garmin aera500 GPS that I use in my Rans S-12S and it is such a better unit than the dated Garmin 495 that I can not imagine why I should go back to it.
I'd also love to add essential backup gauges to the instrumentation in case of a complete electric failure and so on and so on.
Regardless of what these changes are that I am considering the unfortunate constraint with building to LSA certification is that any deviation from the plans and the certified SLSA prototype would require a written approval by Van's in order to be accepted by a DAR during inspection. Van's would have to certify (and be liable for) that a change you've made doesn't adversely affect the airworthiness of the airplane in comparison to the SLSA prototype. For smaller changes I could image that they do that, for a complete change in avionics they certainly wouldn't.
So the options you have as a builder at this point are pretty limited. It comes down to a digital decision. You either build to LSA standard, get the certification done and do all your changes after the certification which then are completely legal and do not change the LSA certification (isn't that kind of hard to understand?). Or you choose to deviate from the plans and even leave out complete sub kits and brew your own. In that case you cannot certify the plane as an ELSA but as an Experimental - Amateur Build or E-AB.
The difference is that you will have to prove to the FAA that you built the airplane according to the 51% rule, the majority of the plane must be amateur-built. So you need a detailed builder log and photos proving that you built the different stages. You also will be required to fly off significantly more hours before you're allowed to leave the test area and before you can bring a passenger with you. The standard for E-AB is 40 hours for Phase 1.
This all stands against the option to save a lot of money and/or to get a much better airplane.
So while I was considering these avionics options I now also see the option for saving a large amount of money which essentially means that I could get airborne with the -12 a whole lot sooner.
When I was researching airplanes to build and looking at my budget I was coming across Jan Eggenfellner's new LSA engine project called the Viking HF-110 engine. Back then when I was considering the Rans S-19 he was in the earlier development stages flying this engine on his Zodiac and making a lot of progress. This engine is a Honda engine as it is used in the Fit and Jazz models and produces 110hp continuous and has weight and size parameters that make it compatible to the Rotax 912S.
What makes this engine really interesting is that appears to run fine and reliable for quite a while now (yes, with Jan's prototype) and the price tag is about half of the 912S while the weight is in the area of 25lbs heavier than the 912S. Fuel consumption appears to be 5 gal./hr.
Well, back then I dropped the idea as the prototype was about 50lbs heavier than the Rotax and the S-19 already had (and still has) a weight problem so you were exceeding gross weight with two 190lbs humans and full tanks for traveling on board. And that was with the Rotax! So, I forgot about the engine a bit as I wanted to go LSA with the -12, but the money issue came back and so I checked on the status of the project and Jan seems to be coming along very quickly with this new engine. He showed it at Sun'n'Fun 2010 and also at this year's Oshkosh.
I've heard from Jan that two RV-12 builders are currently working with him to put the engine in and will soon be flying. The official delivery of the engine starts in December this year which means that by summer next year there should be some realistic feedback about the qualities of this engine available. And that is when I could make the decision to go for E-AB, do my own avionics and with an alternative engine.
So, I'm pretty excited about this possible new option while I am trying to sip the KoolAid very slowly and see if this engine can fulfill my reliability requirements.
Wednesday, September 8, 2010
Fuse Kit Scheduled
The written order confirmation and delivery estimate arrived yesterday. The Fuse Kit is now scheduled to ship on 10/4, hopefully it's going to make it here by the end of that week.
Tuesday, September 7, 2010
Withdrawal Pains

Well, it's about 2 weeks into receiving the wing kit and I honestly tried to distract myself with all the other things I used to do on weekends and in the evenings (before I started building the -12) but I can no longer pretend that I am not affected by this leisure period.
I guess it's because it is an undesired break, kind of like a forced vacation, and I start suffering from serious withdrawal pains. It is getting so bad that I am looking into fun airplanes to build once I am done with the RV-12... Seriously!
Take a look at the Fokker D-VII from Airdromes Airplanes. I think this might be something fun to fly down here in AZ were an open cockpit is fine to fly about 10 months a year.
Let's see if the dreaming about flying a dawn patrol along the fence at Nogales can make the 2 weeks appear to be shorter....
Subscribe to:
Posts (Atom)


