Tuesday, June 29, 2010

One Side Down, One To Go...


Within two hours I finished riveting one side (two surfaces) of the Stabilator tonight. I hope I can get one more surface done tomorrow morning before work as working in the afternoon is just ridiculously hot in the shop. Maybe the A/C that is supposed to arrive tomorrow morning provides some relief.
Really nothing exciting at this part of the build but I find it very satisfying as riveting always marks an endpoint of a job (well) done.
While I was riveting my mind was wandering and I am thinking that maybe it might be a good filler for the time I am going to be waiting for the wing kit to think about the paint scheme. After all it appears to be silly to completely finishing the assembly of an airplane only to take it apart again to paint it and put it back together. Why not paint it now, before assembly, and then just leave like that? Sure, the paint might get nicked here and there, but that would happen also during use - the usual hangar rash. I have to think about this a bit further... it sure would fill that hole of maybe 7-8 weeks of waiting time that might be ahead of me.

Sunday, June 27, 2010

Skins Are Coming On...


Did I say I wanted to build a bit slower the other day? I must have been hallucinating. Either that or it is just incredibly hard for me to slow down. It is just too much fun to let it sit. Sigh!
As I said before I wanted to just slide the skins on and see how they fit. I know, I should have done that before priming as any adjustments that required removing metal would have also caused to re-prime. Well, I was too confident and got lucky as the skins really just came on easy. The radii of the forward ribs fit perfectly and nothing was resisting the skins to bend smoothly around the leading edge.
So, I thought, why not just cleco them on and keep them in this position for now ... Well, you know how this will end, right?
You got it! I just kept on clecoing and then I thought, well this went smooth, maybe I should just turn the thing over and do the other side as well. And that's just what I did. The only mistake I made here was to not question the manuals direction enough that said cleco top and bottom of ONE skin first, then rivet both surfaces and THEN work on the other skin. I couldn't figure out why I should flip the Stabilator over and over when I can also do all that with only two turn overs and be done.
Well the reason escaped me at that point but while I was happily clecoing away it started to dawn on me that I just won't have enough clecos to finish the job. I think Van's suggested 350 copper clecos and that's just what I had. My guess is that it takes about 450-500 to fully cleco the Stabilator with both skins on both sides. That is if you follow the other direction that explicitly said in two locations, cleco every hole on both surfaces! I didn't want to screw up the skins by introducing any tension or twist, so I did just as directed. My Avery cleco tool was a life saver here!
No harm done though, so I had less to cleco and more time left. Any idea what I might have done next? Exactly! Well, so far so good I thought, maybe I should just do a few rivets as this is the part that I love anyway.
So I started the slow riveting process beginning on the leading edge and going aft one rivet at the time. I stopped at the spar and just took out every other cleco here to speed up the next riveting run. I don't think that doing this along the spar could introduce any tensions or twists.
But that job is something for during the week. I'm tired now and I didn't even take my time for dinner ...

Skins Washed


The wind this morning was not calm as forecast. It was rather gusty and the thermals built up quickly so it didn't look like a fun day for low Cross Country flying at all. Well, as long as there are still parts in the kit we always have an alternative, right?
So, I started the day by washing the roughness of the primer off skins. That went well and pretty fast. I put a photo in but I doubt you can see the difference, can you?
I think I might just go ahead and see how the skins fit on the skeleton later this afternoon ...

Saturday, June 26, 2010

Skins Primed


The wind calmed down in the later afternoon enough to risk the priming. After two hours the work was done, including the cleanup. The reason why it took so long this time was that I had some trouble with my paint gun or rather the paint in it. The primer dries so quickly that it clogged the gun in between swapping the two skins on my painting table and then I had to remove the paint from the cup, spray wash the interior with MEK and then get the paint back in and clear out the rest of MEK with paint. That is really the only downside of this otherwise excellent primer. It just dries too quickly and tends to do that in the gun as well. But how can you blame Cortec? It was 108 degrees during my paint job.
In addition to the skins I also primed the back of the piano hinges as they are about to get riveted on the skin flanges. The outside of these flanges got primed too because of that.
I guess tomorrow will be more water splashing when I am washing the roughness off the inside of the skins. But I do hope for some fun in the form of flying my little RANS, too. Early in the morning I'll be heading out to the strip and see if I can discover a new airport - Gila Bend.

Prepping the Skins


In the early morning I rushed to the shop to get the work done and leave before the heat builds up. I finished the prep work from the previous evening which was to remove the vinyl on the last skin. Then I went to the VpCI-440 washing and scrubbing routine. The skins were really awkward to handle because of their size and washing off the 440 became a problem for the first time. I don't want to have the residues building up in my backyard and so I have a huge bin to collect the dirty water and dispose of it in the sewers. Only problem now is that the skin's dimension did not fit the bin. With the help of gravity I caught most of the wash-off though.
The skins are drying now and I am waiting for the wind to calm down before shooting the primer which I hope I can do later this afternoon.

Friday, June 25, 2010

Preparing for Priming the Skins


Friday evening went into a lot of prep work for what appears to be my usual weekend happening these days: prepping and priming aluminum. So, I match drilled the piano hinges that will attach the ASTs later. BTW: When you're done drilling these and look at them you have this feeling as if you really goofed up. That is because some the holes do not align and look awkward to the eye after drilling the formerly masked holes through the skin flange. Don't worry! I got spooked by that and clecoed them to the skins as they will get riveted to the flanges later and they match perfectly.
The rest of the evening was spent deburring the skins on the edges and the outside holes (these were slightly sharp where the punch exited) and finally removing the outside vinyl along the rivet lines and the complete vinyl covering on the inside of the skins. This would get me ready to start prepping them in the early - if time wouldn't have run out. I finished one skin and left the other for the following day.

Thursday, June 24, 2010

Saw Horses

Tonight I've built some saw horses I got from Harbor Freight. They were to get assembled and it took a while but they seem to be sturdy and I will be happy to have them when I try to get the skins on the Stabilator and then later when I build the tail cone. Both jobs wouldn't be easy to do on a work bench that is only accessible from one side.
I took a moment tonight to also sum up the overall hours worked on the plane so far. They added up to 96 hours.

Wednesday, June 23, 2010

Measurements, an Insight and an Epiphany


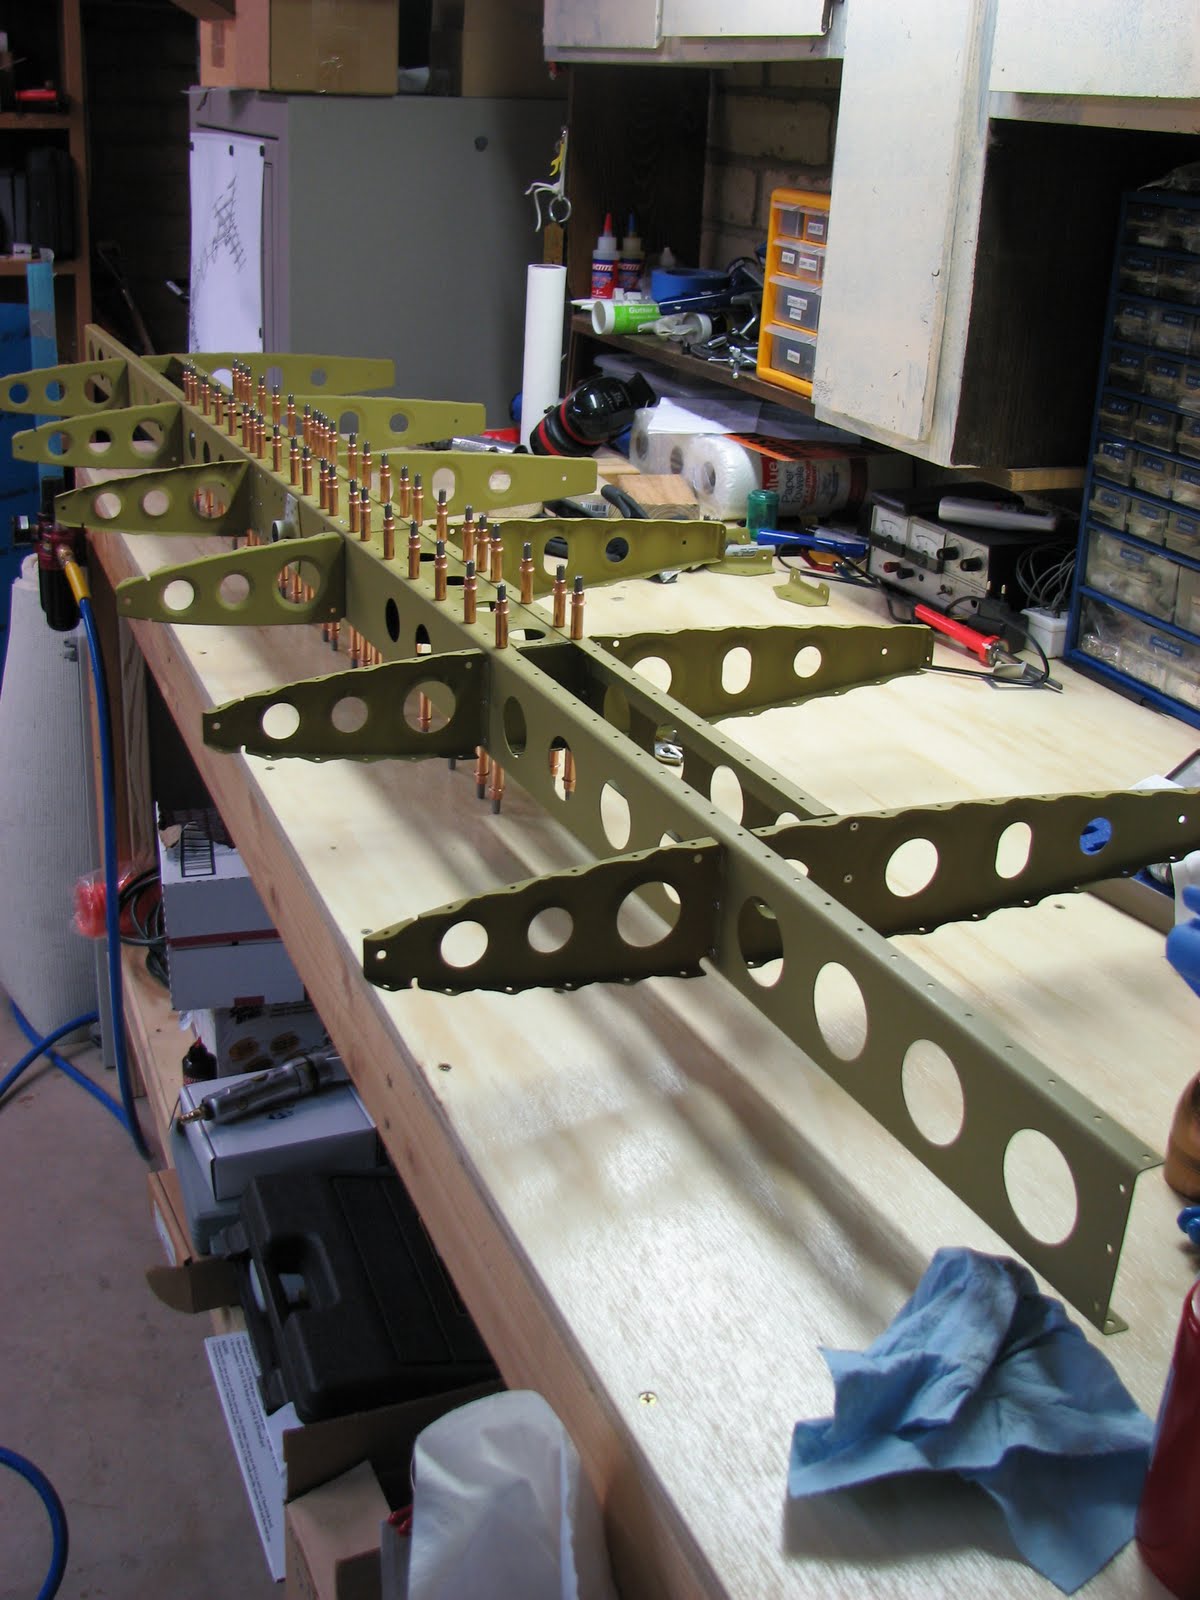
I didn't have much time tonight but I wanted to at least understand if I needed to do any trimming on these hinge stop tubes for the Stabilator - this is where I left the shop yesterday. So, before doing any trimming to blindly follow the manual and the requested 21/32" +1/32" -0" length, I took a closer look at how Van wants me to finally attach the Stabilator to the fuselage.
As the manuals explicitly asked to leave the shape and the angle of the hinge brackets alone and some of the shorter tubes fit just perfectly, I was wondering if I really have to go through a trimming process that would then violate this explicit request.
The question was, what has to fit in between those hinge brackets when the Stabilator is attached to the fuselage and will it fit with the shorter tubes as well?
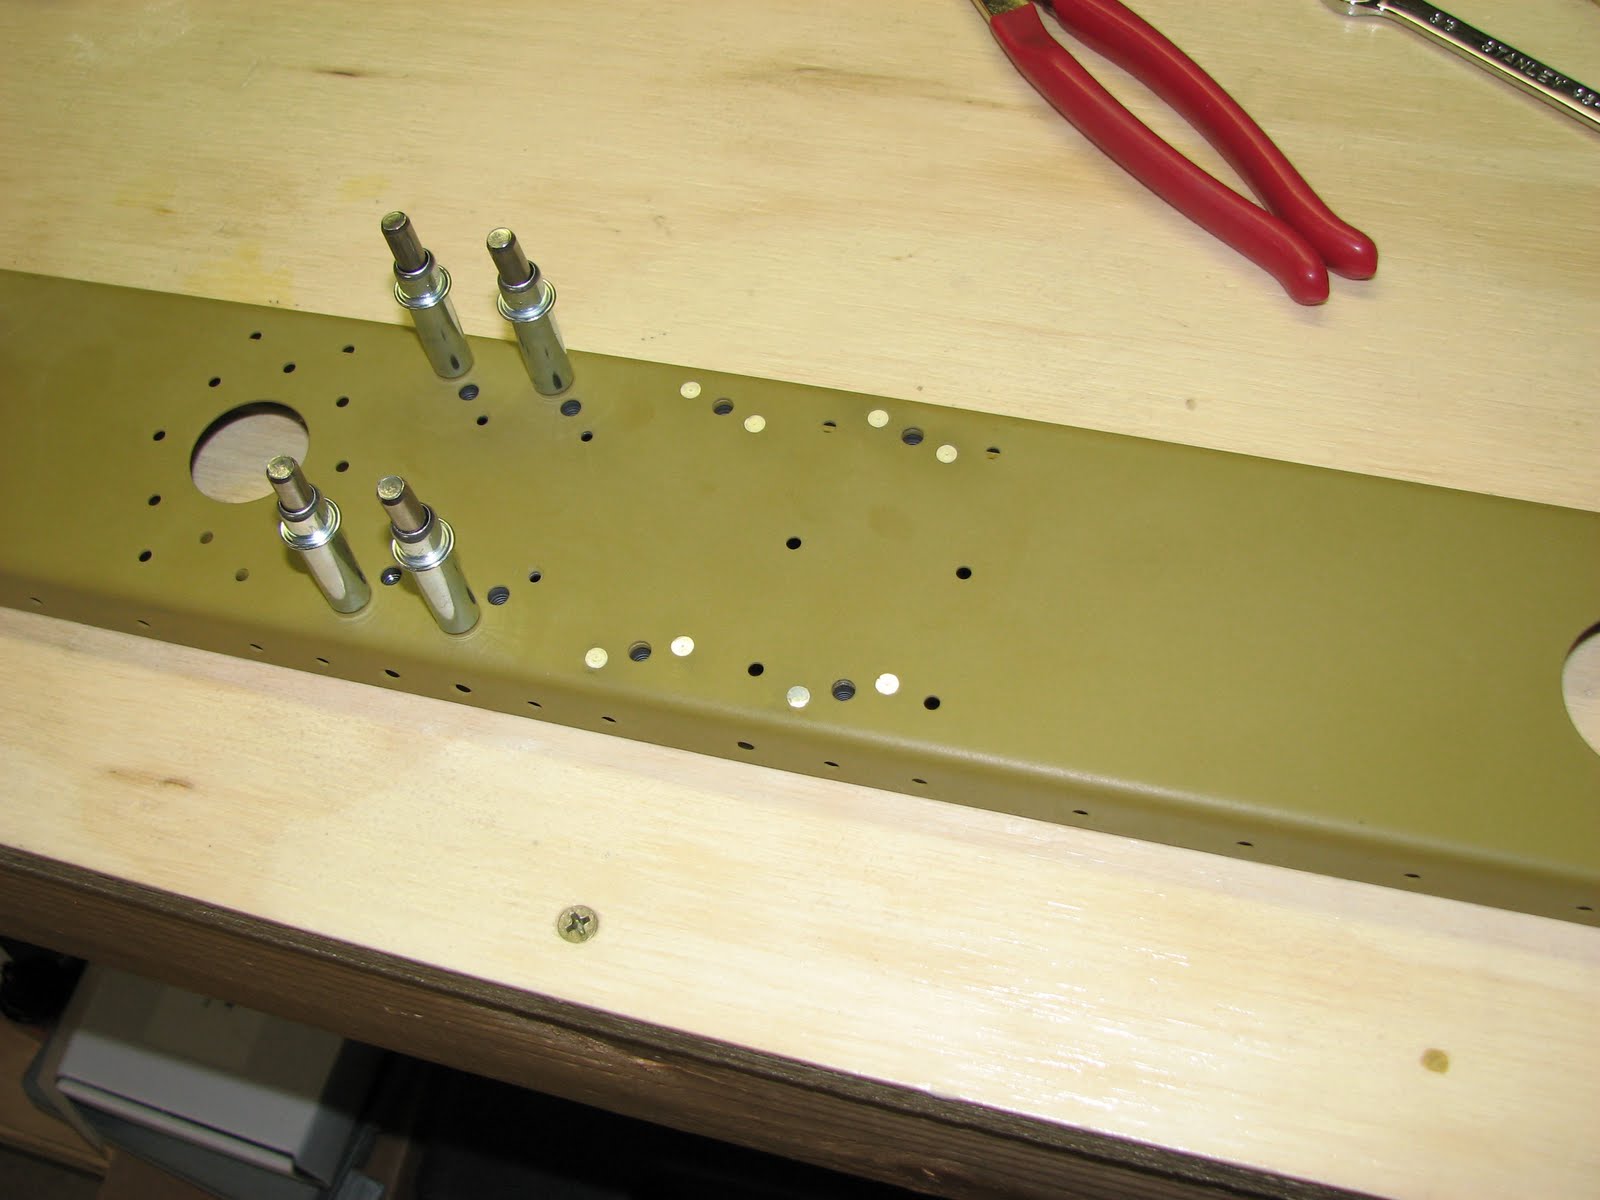
The answer to this question is on page 10-04 and it shows the bearing VA-146 which will be placed in between those hinge brackets. A first test showed that there must something else as it had way too much room in there. So looking a bit further on page 10-05 I found the callout for the additional mounting hardware: AN960-416 or -416L as needed between the bearing sides and the brackets. I tried two -416L with the shorter tubes and I could just get it in. No leeway but the bearing moves freely. This tells me that the length is just fine and I will not do anything with the shorter ones. The other bracket turned out to be a tick wider and I needed a -416L and a -416 to get the same tight but tension-free fit. Here I will trim down the tubes a bit to make them slide just in, but that was not a job for tonight.
So, the insight that I gained is that sometimes it makes sense to take a closer look at why Van's wants you to do something in a certain way and there might be a bit of freedom once you understand what it is. Well, if you goof up it was certainly your own fault though and not Van's. A risk that I'm going to take in this case.

Well, that's all nice and good but what about the Epiphany I hinted to in the title?
Hm, it's a bit hard for me to admit that - even to myself, so not to mention to you! The thing is, I am building way too fast! I don't think this is owed to my outstanding engineering or metal working skills but more to the fact that the RV-12 kit is simply amazing in terms of precision as well as the level of pre-manufacturing. It is almost like putting together a Lego set
If you scroll back a month you'll see that I just starting to build the airplane in early May and now the Empennage is almost done and the tail cone won't take very long either. My cautious estimate of completion of this subkit is end of July - IF I continue at this pace. And you might have already noticed that I slowed down a little. This was partly due to the heat but partly also to this Epiphany I had.
So, what am I going to do when there's no parts left on this subkit and the next subkit (the wings) is not going to arrive before end of September - and that implies that Van's is not going to delay the delivery which is not too improbable.
Well, I am pretty concerned about losing my rhythm in the build process as I've seen what this can cause with other builders and I might not be immune to this. The threat is that once you've lost your rhythm you fall into a phase of putting it off, doing other things and so on and even when you get the parts you were waiting for you might not be able to easily get back to your previous build schedule.
My conclusion is that I'd rather slow down now while I would like to go faster and try to keep that drive but spend less time in the shop anyway. This is pretty easy as it is frickin' hot in there and anything more than two hours is seriously painful.
Throwing in a little bit of flying, working around the house and doing other nice things will keep me busy and somehow stay in some kind of rhythm of which I think it might be easier to switch back to all airplane building once the wing kit arrives.

Let's see if this works out ...

Tuesday, June 22, 2010

Ribs RIveted


After checking a few other blogs I decided to go with the plans and turn the inside ribs so the flanges face inboards and show. The riveting needed the use of the little wedge tools created in step #1 of the build process and went quite smoothly but slow.
The hinge brackets got installed as well and I used the torque wrench for the first time which I had just received as part of the Avery Tool Kit from a long back order delay.
When it came to install the recently trimmed hinge stops, I noticed some discrepancy as they didn't fit without bending the brackets at least a little bit and the plans had an explicit note saying that this should not happen. So I used my calipers and measured them - before I had used a yardstick alone. The result was that three of the 5 hinge stops seem to be a bit too long and two are a tad short. Fortunately Van provided a second 4" tube and I might cut another hinge stop from this tonight. I do hope that this "extra" tube is really for cases like this and not used elsewhere. I'll check with Van to make sure I don't have to order an extra part.
It was getting late last night and I felt I might make a mistake if I would not let go and went to bed, so I stopped after noticing the issues with the hinge stops.

I keep forgetting to list my worked hours... From the top of my head I think I just added up about 34 hours for the Stabilator so far, including the prepping and priming work.

Sunday, June 20, 2010

Washing Primed Ribs


I took it easy today. It is just too hot to work all day in the shop without the A/C here. So I decided to get up early and go to the airstrip to go for some flying with my RANS S-12S. It was a wonderful morning and despite the 35mph headwind it was very enjoyable. For the ones familiar with the Tucson area... I went up for a look at Kitt Peak observatory (about 5 miles SW of ROB NDB) and then to Sells airport (E78) to see if the runway is still intact. What a nice escape from the heat it was to fly for 15 minutes at 9500 ft. MSL. It almost got a bit chilly :-).
When I came back I splashed with water by washing the primed parts with a Scotch pad again. I also read ahead in the plans to understand what is coming next and I found some odd rib orientations that don't seem to be right. So I went ahead and just clecoed the ribs in place to see if the orientation makes sense. I also want to take a a look at some blogs to verify that I'm doing this right. In this photo I actually had left out the forward ribs that looked odd. The thing that set me up was that the two inner ribs were shown to be facing the flange towards the (open) inside, the part that won't be covered by the skin. I thought it was odd to show the ugly side with the protruding shop side of the LP4-3 rivets instead of making it look nice. It seems one could turn the flange towards the covered part of the Stabilator without any problems as the rivet holes are centered on the flange. I saw that Marty's blog shows a photo were he did it according to the plans whereas Dave from Schmetterling Aviation did it the way I'd do it.
Guess I have to flip a coin ....

Saturday, June 19, 2010

Prepping and Priming the Ribs


As promised, here are the before-after photos...
So I spent some more time scruffing and scrubbing aluminum. This time with the H-Stab ribs. After hanging them to dry, I sprayed some more primer - did I mentioned that I'm getting real good with the paint gun by now?
I let the primed parts sit over night for a good dry.
My shop A/C still hasn't been shipped as the manufacturer decided to discontinue the model I had ordered a week ago and came out with a "new" model that looks exactly the same but has a new model number and therefore the vendor had to figure this out before calling me to confirm that I'm ok with this.
It was 96 degrees in the shop this afternoon, so what do you think how much I care about the model number at this point???

Tuesday, June 15, 2010

more deburring ...

Nothing exciting happened tonight. Just a little bit more of this &^%#! deburring work on the ribs. I finished them all and also fluted them so they would align reasonably straight to get the rivet lines in the skins matched with the ribs. That was all I could do before running hot... 105 degrees is really uncomfortable. My window A/C unit should arrive soon!

Monday, June 14, 2010

Fine Tuned Mounting Holes on CW Arm

Tonight I just took 40 minutes to fine tune the size of the forward mounting hole in the counterweight arm to make the bolt snugly fit but also insert easier. It took a 7/32 drill to widen it enough for the bolt to slide in while maintaining a tight fit with both bolts installed.
I deburred the holes again and cleaned out the steel chips from inside the tube.

Sunday, June 13, 2010

Spar Box assembled, Ribs to come


Today was assembly day. The fully primed Spar Box was put together and the first rivets were set. Among them the first CS4-4 and a large number of squeeze rivets and my arms can tell the story. EVerything went well except for the counterweight attach brackets. One side was perfect and for some reason the other one did not perfectly go on. After the first 3 rivets it seemed to shifted slightly out of alignment and I couldn't set the next rivets easily but had to make the choice to drill out what I had set so far and start again or to "match"-drill the holes and continue. I went for the latter and I am wondering if that got into more trouble than what it saved me. If the counterweight attach arm is not going to get through those brackets because of this misalignment then I will have to take all the rivets out and not just the few that I wanted to avoid drilling out. Oh-boy! Of course this premonition occurred to me after I had closed the shop and not while I was making the decision to keep on going by match drilling the holes.
I couldn't go to bed worrying about this little misalignment, so I went back to the shop and tried to get the arm in the brackets and it .... worked. Whew! One of the bolts drops in freely but the opposite one then needs a little fidgeting to seat but it does go in. So, what I'll do next is probably opening one of the holes in the arm a little bit further to let that bolt slide in freely. That should then end my worries about this little mishap and it will make sure that I'll be paying more attention to these details before squeezing another rivet ...
Besides the satisfying work of riveting, I had to manufacture the hinge stops by cutting 21/32 in. off of a 4" tube and make sure that I wouldn't file them too short as they only may be 1/32 longer but no tolerance on the shorter side was allowed. That was not so easy with the relatively soft aluminum the tube was made from. Anyway, it looks like I did a decent job with them and the truth will come out when the hinges are being installed.
The rest of the evening I spent with the mind-bogglingly boring work of deburring the edges and holes of the ribs which will soon be installed (well, after prepping and priming and washing, of course).

Saturday, June 12, 2010

Prepping and Priming and a little Riveting


Using the early morning cool I started the day by prepping the surfaces of the Spar Box and a few other parts I Had identified to be ready for priming. The usual routine by using Cortec-440 and a maroon Scotch-Brite pad and water to rinse.
The long forward spar took a while to get done but other than that no surprises.
Around noon the parts were ready for priming and unfortunately the wind had significantly increased to the point were I was afraid if I actually could get the priming started at all. I took my chance and it turned out to be just manageable.
Later in the evening when the parts had reasonable time to dry and settle, I washed of the excess dry spray by scruffing it with a dish washing Scotch pad and water as described before. Then I started a little bit of riveting on the nutplates of both spars.
There's much more of this to come tomorrow....

Friday, June 11, 2010

Counterweight Positioned


Tonight I put together the Spar Box assembly for the first time. It fit pretty good. The hinge brackets got installed to drill the holes for the nutplates. Also the Counterweight arm and brackets got installed to drill the #12 holes for the bolts that will later hold the arm in place. The exciting part here was that the nutplates were not to be put into spots with prepunched holes like everywhere else but more builder-like by first drilling the hole for the bolt and the using a bolt to hold the nutplate in place while drilling and clecoing the attach holes.
There were a few holes on the flanges that had to be countersunk with 120 deg. nuts for the CS4-4 rivets. Not mixing these up with the usual nutplate attach holes was the only challenge here.
At the end of the night everything had to be taken apart again and deburred and cleaned from chips. Now everything is ready for the surface prepping and priming before Spar Box will be riveted together.

Thursday, June 10, 2010

Spar Box on the Way


This evening I was able to get quite a bit done. I washed off the rough surfaces of the parts I primed yesterday with water and a hint of soap and a Scotch pad (not a scruffing one but the one for doing the dishes). It might be due to the heat and dryness in Tucson but even with diluted primer (you can add up to 10% water to VpCI-373) it dries so quickly during spraying that the surfaces always end up being quite rough after they completely dried. I tried a few things to polish it afterwards and what works best and quickest is that aforementioned Scotch pad for dishes and some water. Afterwards I rinse it quickly with water and let it dry.
After the washing I could already rivet the inner Spar Box. Nothing exciting here, except that the plans are very wrong about the rivets to use. That includes the Where and also the type. The noted AN426AD3-x are not marked everywhere where you should put them to finish the inner Spar Box. That's not too unusual for the Oregonian Manuals as we've already learned in the previous sections but this time they call out AD3-4 rivets in places where they appear to be too long and the AD3-3.5 are totally sufficient. Use the -4's only on the far out countersunk holes on each far end of the Box. It's obvious that you need the longer ones there as you have to rivet 3 pieces together. In the inner locations though my gauge shows that the -4 are too long and not necessary.
Besides that there were no further surprises - except that I had previously forgotten to deburr the outer spars that would complete the Spar Box Assembly. So I had to do that and then ran out of time before it was time to close shop and head for bed. That's why you can see the Main Spar leaning next to the rest of the Box.

Wednesday, June 9, 2010

Spar Box Parts Primed

And another short evening. Before daylight disappeared I finished priming the parts for the building the Stabilator spar box and some other small parts that didn't need further processing. I'm getting real good now with the paint gun which will become very helpful when I finally shoot the exterior paints where this skill will really count.
I finished cleaning the tools and workplace after sunset, so there was no chance to take any good pictures but you'll see them when I put them together :-).
Hope to get some shop time tomorrow for a couple of hours, not sure though.

Tuesday, June 8, 2010

Spar Box Parts Prepped

A short evening at the shop. I just identified the parts that will be put together with no further trimming or drilling and prepped them with Cortec VpCI-440 and a Scotch-Brite pad (Maroon). There were a lot of small parts which actually made it much more time consuming than anticipated. I spent two ours and finished right after sunset.
Tomorrow I'll shoot the primer.

Saturday, June 5, 2010

Flettners Finished


This morning I finished the Anti-Servo-Tabs. It was not all easy, though. Seating the countersunk rivets on the inside rib was tricky. The rib and the horn are not really thick and when the shop head is formed there is some bulging taking place. As they're countersunk I didn't have the option this time to put the shop head on the thicker outside as I did with the rudder. So, I drilled out a few a used some C-Clamps to add some additional force on the pieces and it helped somewhat to keep them a bit closer together. I just hope that I did a good enough job which will show when the ASTs get attached to the H-Stab. Allegedly there's not a lot of leeway for anything but perfectly attached rudder horns on ASTs. I guess I will find out soon.
The only other noticeable thing about the ASTs is that riveting the top skin to the inside rib needs some tricks to get passed the rudder horn that is in the way for easy riveting. You could probably use the wedge tool again and pull them with the pneumatic riveter but I thought I'd give the smallest manual one a try. This little tool was part of the Avery Tool Kit for the RV-12 and I was wondering when I'd be using this for the first time. Today was the day and it worked very well. It's a bit unusual to use as you cannot slide it onto the rivet's mandrel without actively opening the jaws which requires the handles to be forced open. Once set and the handles are released they hold on to the mandrel by the force of a little spring. It needs two squeezes to pull the rivet and in between you have to readjust it back to the rivet head by forcing the handles to stay open again.
A little weird feel the first time but you get used to it and it indeed has a very tiny head to get into those hard to reach places.

I've also located the H-Stab parts needed in the next step and briefly looked at the manual. This looks like I want to thoroughly study the blogs of others before screwing something up. It looks like the H-Stab is a bit more complicated than what I've dealt with before.
Maybe tonight it's cool enough to go back to the shop.

Oh, almost forgot... the overall time to finish the Flettners was 12 hours. Pretty quick.

Friday, June 4, 2010

Flettners Primed


And another evening after work provided enough sunlight to shoot the primer on the few parts before darkness. As expected priming the inside of the skins was a bit tough but I think I did a good job on them anyway. I'll let the stuff dry over night and then it should be ready for some riveting in the morning. There's not a lot to do to complete this step, so I expect the ASTs to be finished before noon and I hopefully be back inside before we cross the 100 degF again.
The skins had to be partially primed on the outside as well as on part of the hinge will be riveted against the outside of the lower skin. I didn't want to get too complicated with the masking tape, so I just shoot the opposite side as well.

Thursday, June 3, 2010

Flettners Preped for Priming

No photos today, just took some time after work to scruff the surfaces of the AST parts and washed them with Cortec VpCI-440 and let them dry over night. Scruffing the inside of the skins was nasty as these parts are to small to easily bend back again. This will be fun when shooting the primer!

Wednesday, June 2, 2010

Wing Kit on the Way

I got confirmation from Van's that they received my order for the wing kit (and the lighting package). Planned day for shipping the kit is 9/13. That gives me some time to finish the empennage and stay out of the Tucsonian summer heat which will make working in the shop a pain in a few weeks.
Um. and it'll also give me some time to figure out where to find the money to pay Van's ....

There's not a lot to report from the factory. After finishing the rudder I started on the AST - the infamous Anti-Servo-Tab - and I still don't know why there are TWO and not just one. I guess I will find out when I hook up the controls.
I am prepping the parts right now and am getting them ready for priming. As the surface prep is a time consuming job I have to see if I can get home early one day this week to get it done before nightfall.

Tuesday, June 1, 2010

Preping the Anti-Servo-Tabs


FInally something small to deal with. I traced the parts needed for the ASTs or Flettner Tabs (WIkipedia is an amazing source of information) and match drilled and deburred the edges and holes and tried to understand what the Oregonian Manuals want to tell me (the part about the hinges is mysterious again).