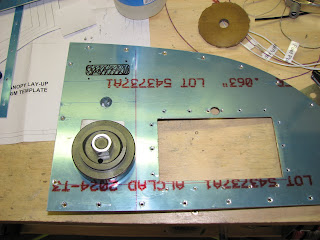
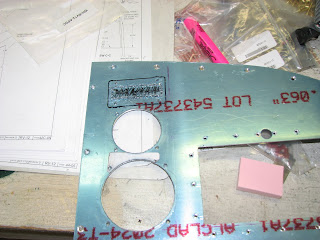
I must not have been all awake when I started building this morning. I was eager to finish the rudder pedal installation by installing those little brackets aft of the tubes the pedals are connected. It all went well, despite the tight quarters.
Despite the Boelube it was quite a challenge to force this screw in with so little room to work. I left the screw a little loose and the installed the two flange screws that were secured with locknuts.
These nuts were even tougher to secure than the screw in the platenut, and I needed all the modified tools I had to get a handle on the nut close to the tube. There's really no room to work in this plane. Wow, what a nice installation, huh? Well, this was just a trial run and it all had to come out again. You might have noticed that there are holes for a nutplate in the flange of this little bracket but there's no nutplate installed, is there? That's why I said I must not have been fully awake when I did that.
Oh my, out it went again. And the nutplates went in.
The second time the screws went in much faster and so after a few minutes I had this, but this time with the nutplate installed.
With the extra experience the upper one went in much easier than I had expected. A lot of Boelube (also on the Nylocks) helped a lot!
With this installed, I now warmed up and fully awake, I carefully approached the panel work. I already had to replace one panel and I didn't want to do this again.
The first step in panel work is to locate the center of each planned for instrument (if it's round that is). I drew a vertical reference on the panel for measurements. As you can see with the angle, the inner edge is not vertical at all. Assuming that the panel base in horizontal, I used the 90 degree angle to draw that reference line.
Then I places the instrument patterns on the panel and determined the horizontal reference that the lowest instrument should touch.
Then I did the match to determine where the centers of the instruments should be located, with a 1/4" separation. I drew these horizontal lines and marked the center spots. Placing the drill jig over it so see if my math was right and everything looked correct.
With the centers verified, I marked the spots with the center punch and drilled the pilot hole in #30. Followed by the step drill to bring the holes to 5/8" for the hole punch. Here you see the hole punch installed for the 3 1/8" cut and the upper one shows the pilot hole for the punch.
I had never done this and you probably neither, so let me tell you that the punch has to crack twice through the aluminum. Once you've heard two distinctive cracks, the punch is through and you can take the thing apart.
Ready for round two. This is how I did it. Put the lower part in a vise and then use 1" wrench to turn the nut. Lots of Boelube on the inside of the punch to ensure a nice smooth edge.
As you can see, this worked out pretty well. I softened the edges by rubbing a maroon SB pad inside the cut out until it felt all smooth.
With the help of the drill jig, the wholes were quickly added.
The PCAS cut out was a little trickier. I first drilled the mounting holes using the panel cover as a drill jig.
I then clecoed the panel cover in place and marked the outer perimeter line that I should not exceed.
The next step was to use the same #30 drill and perforate the outline of the cut out area.
Using the Dremel cutting disc I cut through the perforation, followed by filing the edges smooth and deburring them with the SB wheel.
With a little cleanup and removing the blue protective cover the right panel is now ready for painting.
The last step was to manufacture the covers that will go in place of the instruments until after certification. I used .025" sheet metal from a flaperon skin I messed up. I cut a large piece of out the skin using tin snips and then marked the correct cut outs on the sheet metal and used the band saw for the cut, the SB wheels for the trim to come up with this.
This is the drill jig for the instrument holes. The holes are on the other side.I used a wooden block on the back of the sheet metal and drilled through the jig very slowly and carefully.
One done, two to go. Look how nicely the covers turned out.
And the last one was the rectangular one for the PCAS.
Done!
Now the panels are all ready for priming and painting. I am still waiting for the 2K primer from Stewart, but this won't be a hold up as I won't be building tomorrow. A road trip to Phoenix is on the program for some political grassroots work.
For Liberty!
Friday, May 11, 2012
Subscribe to:
Post Comments (Atom)


No comments:
Post a Comment