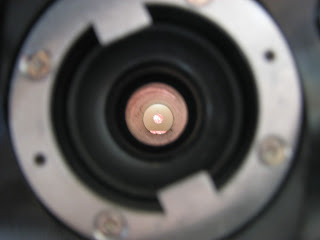
First a picture of the radiator seal in broad daylight.

I removed the oil cooler and broke the silicone seal I had created a few months out. Needless to say that it was a bit tricky to separate the surfaces after such a long time, despite the oil I had put on the oil cooler's face.

Next was to mask the area inside the cowl that needed to get cleaned and scuffed to apply the ceramic heat shield.

The stuff goes on thick with a brush and after about half an hour the first coat was on.

Looks good and I decided to let it dry and work on the pitot tube again. The installation of the pitot block to the engine was up next.
That's when I realized that I had not yet noticed that the block has side that is threaded and a side that is not. Not a big deal but it meant that my markings were on the wrong side. I fixed that issue and went on.

Unfortunately, the block refused to pass the cooling shroud.

The instructions point out that it was ok to trim the block to allow for the necessary clearance. Chamfering the edges on the bottom of the block was enough to get it in place.

This is how it looks from the spinner side.
I remembered that Dave had quite some trouble getting the left screw installed on this block. Well, I did not think it was that big of a problem on mine.
All I needed was an extension to put on the short end of the allen wrench to be able to turn that extra 1/4 turn. Putting the safety wiring on was more of a challenge but only because this was my first time using the funky HF safety wire pliers. The EAA video was a great help to get a hint of what to do with it.
A lot less fun was the connection of the pitot tubing to the metal pitot tube. I used dish soap as a lubricant on the plastic to plastic connection and also chamfered the inside of the outer tube on both side with a step drill.
I wish I could have gotten it in a bit deeper but even a hammer did not help to make it budge a bit further. Getting it on the metal end was simply worse. The tube would not go on straight because the cooling shroud does not allow enough room. I ended up removing the metal tube and using the SB wheel on the end to smoothen edges. Then it would finally go on with the help of a wrench that pushed on the larger outside tube. The safety wire was not that hard to put on but I I do not like how the wire cuts into the outer tube. I know first hand that this is a common point of breakage. The vibration and a cutting wire is not a good combination for long-evity and I my friend's RV-12 had a leak in that area while we were flying to our Repairman Certification Course.
I tried cable-ties but they have a problem with that small radius and probably don't hold the tube tight enough.
After 4.5 hours I did not feel like working on the more demanding task of trimming the spinner. That's for the next session. However, here's a first glimpse at how this soon might be looking like.
Later in the day I was able to apply the second, and probably the last, coat of ceramic paint.


No comments:
Post a Comment