
As you can see we were going for a 2-piece approach. Let me tell you right now that this did not work out too well, so you might want to read ahead a bit before following my steps.
The templates were put onto the aluminum foil to mark the outlines.

I generously cut out the pieces along the marked lines.

Before I could think about applying them to the cowl I wanted to make sure the exhaust pipe would actually fit through the hole in the cowl. Therefore I needed to attach the muffler that had been removed previously to have easier access to install the oil lines.

At this point I decided to fix an issue with the actuator line that moves the heater door rubing on the lower oil hose.

It just feels better to know that the metal plate could not directly work through the fire sleeve and the oil hose before going through the vinyl hose first.
This thing is pretty much out of sight once the lower cowl is installed and so I wanted to give it some extra protection.
Now I wanted to get the lower cowl on to see if the hole fit the exhaust pipe. However, getting that cowl on to begin with was anything but easy!

First you have to thread in the pipe while trying not to completely scratch the nose wheel arm, then you can actually get the cowl up and in position.
It didn't fit too well yet!


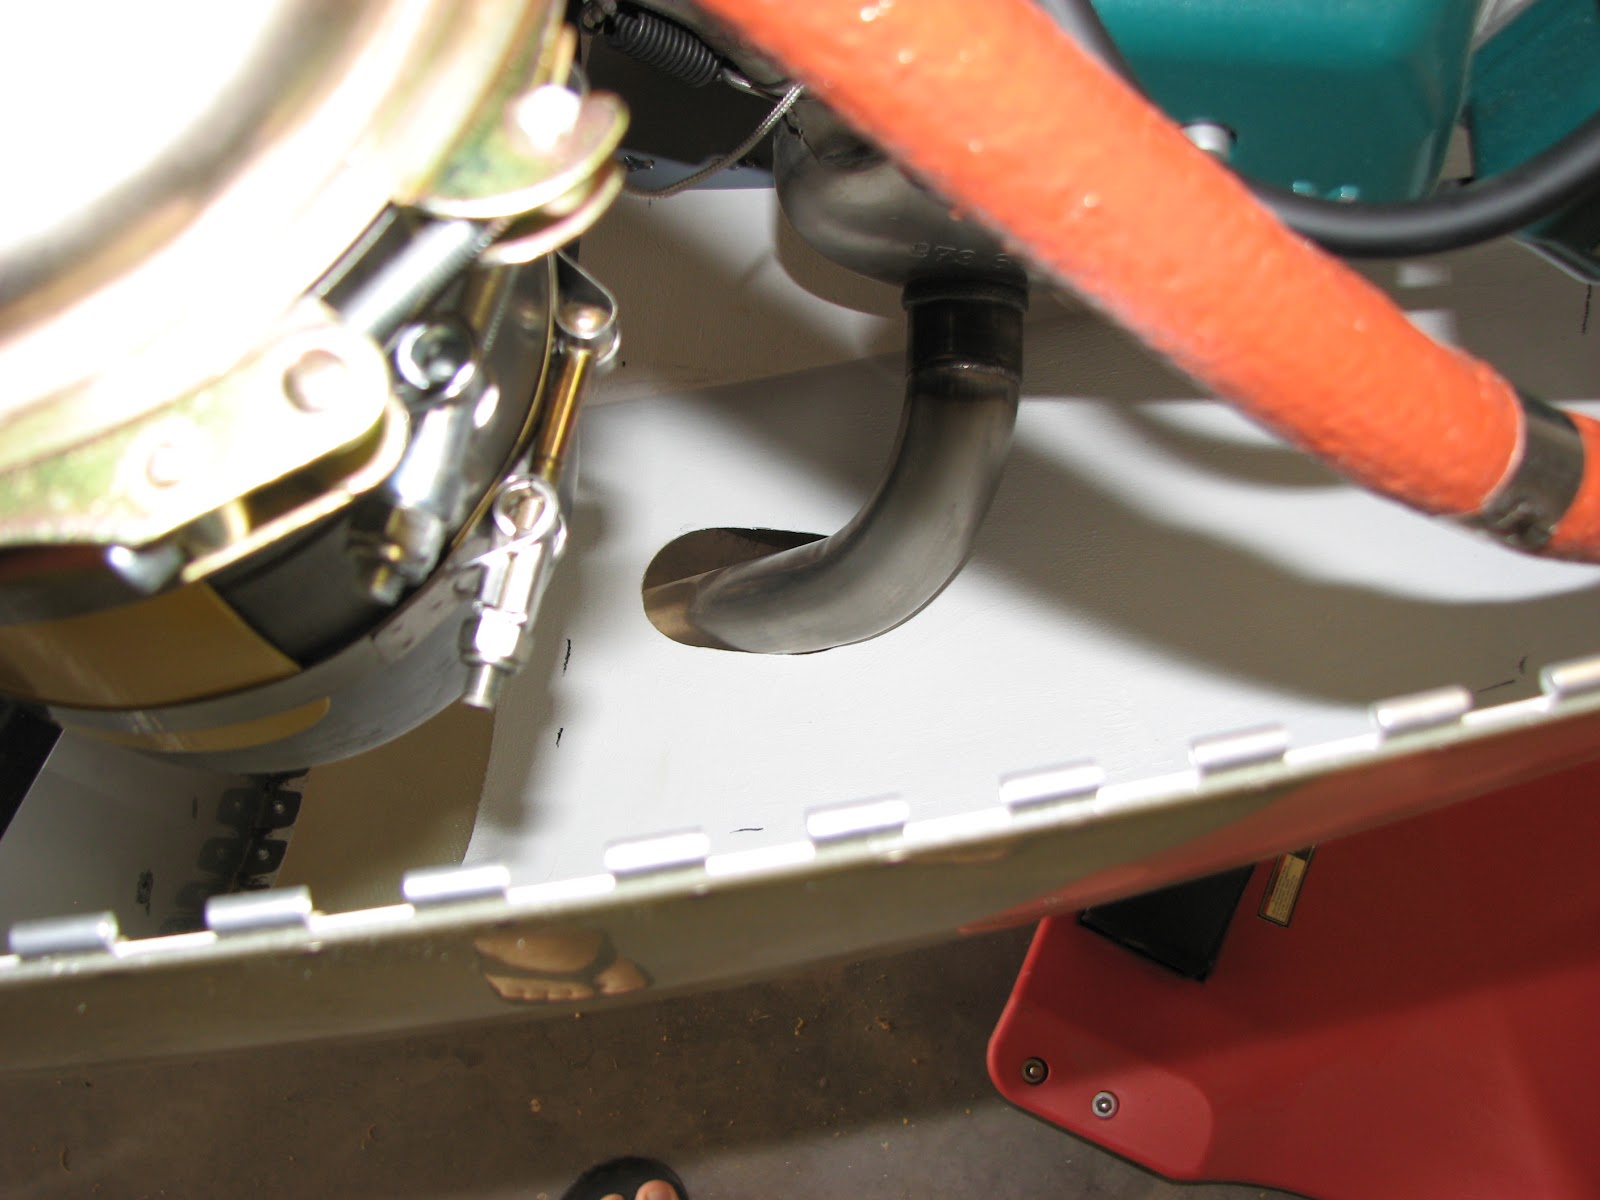
Obviously, the side and the front of the hole where interfering. I decided to loosen the copper nuts holding the exhaust pipes at this point to allow me to wiggle the exhaust a bit to get a better fit.
That allowed me to put the lower cowl fully in place but still the outboard side needed significant trimming.


I drilled some holes along the line and then used the Dremel to remove the material.


I also marked the pipe for later trimming which should make it easier to put the cowl back on.

Now that I had the muffler in its final position, I removed the cowl and re-torqued the copper nuts, trimmed the exhaust hole in the cowl and continued with the application of the heat shield.
The lower part went on ok but I immediately noticed that the left side piece had to get cut off from the lower piece.

Second part was the little right side piece and then the left piece went on. Some of the trimmings were used to fill some bald spots.

Then I applied the epoxy around the edges to seal the foil in. I also used this batch of epoxy to apply the little notice tag on top of the air tunnel.

That was it. Now I have to think about the best way of cutting that pipe. The room is a bit tight for a pipe cutter but that would certainly make the cleanest cut possible. I'll take some measurements and see what I can find.


No comments:
Post a Comment