Note: Please make sure you have read my refitting blog entry before you follow this step. It turned out that I was not tightening the fittings enough and had leaks all over the place.
That was even quicker than I thought. I finished the assembly of the pedals tonight.
I started catching up with what I had left behind yesterday. Picking up the problem of how to secure the position of the brake pedal for drilling. I discussed this with my colleague Tom today who built an RV-3A. Although his pedals were different in design he suggested using a wood block to attach the pedals to. I picked this up and used one of my bigger clamps. The block ensure that pedal stayed in place and the clamp didn't slip off.
This held in perfectly in place during drilling. The inner pedal also posed a problem as it didn't allow for direct contact with the block. Well, that was until I taped an additional offset piece on.
Worked great again.
Boelube and my beloved Sioux drill went through the steel like butter.
I repeated those steps on the other side and took everything apart for deburring and cleanup. I didn't forget to mark every part before disassembly to be able to put it back together again. While the parts were apart I also added the fittings to the brake cylinders as suggested by the forum.
Then putting it all back together. I added the grease for the brake pedals and I had to file away some material on one of the pads as it rubbed on a weld. The other 3 pads went on without any problem. I also inserted the clevis pins, so the unit is ready for installation.
I will probably work on the lines tomorrow night.
Thursday, March 31, 2011
Wednesday, March 30, 2011
Section 27 Started
I have a feeling this section (assembling the rudder and brake pedals) won't take me very long (famous last words? Maybe...). I started tonight by cutting those plastci blocks apart that are holding the pedals to the lower firewall shelf. The bandsaw is a charm on this kind of job, so this was done in a few minutes. Clamping the whole thing to the work bench was easy too and if I had figured out the reason for Van's saying "washers as needed" and it actually even showed two washers under the nuts, I wouldn't have almost ruined 4 of those AN315-3 nuts that were holding plastic blocks together.
When I got to the first alignment part I noticed some serious trouble with my clamps. They wouldn't hold the brake pedal in place or even itself attached to the pedals. This will not work for drilling, I'm sure. Currently I'm using a cleco clamp but that might not be strong enough. At that point I decided to call it a night and delay further experiments on this by another day.
Tuesday, March 29, 2011
Section 26 Completed
Besides getting further into section 23 I also completed the seat backs (except for installing them in the fuselage as they'd be in the way). First I have to add a shot that I omitted yesterday which shows the center support bracket fully installed.
If you look closely, you'll see that I have already started to install the stucco for the side skins. I riveted the vertical post on and sure enough scratched the paint on one of the panels in the left front because there was hardly any room to get the riveter in place. Yikes! I can't even describe how much that irks me!
Anyway, I also match-drilled the arm rest and deburred the holes.
But when it was time to actually rivet them onto the vertical posts I hesitated and decided to wait with this step. The reason for it is the same why I don't want to rivet the side skins on just yet. Accessibility to the tunnel area and the inside of the fuselage. Once the stucco is riveted, getting in the center of the fuselage might require turning the structure on its side and why do that if I can avoid it and delay this part of the installation?
I've decided to finish section 26 instead and will then probably continue with 27 next as this one would benefit from easy access to the lower forward fuse. Next might be installation of the wire harness before finally closing up the sides.
Here are the finished seatbacks with secured hinge pins.
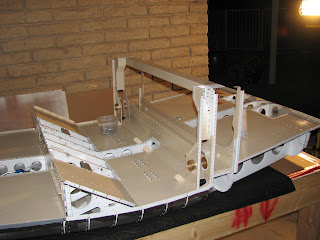
And this is how I left the fuselage. I riveted the little stow pin supports onto the arm rests and put them away until final installation.
Section 26 seemed to have taken me 12 hours straight, including priming and painting (estimated, as I did this along with other parts). Overall I'm now around 580 hours total and no end in sight yet :-).
Monday, March 28, 2011
Finally Back at Making Progress
I know that some of you might not agree but after such a long time at doing this painting thing and doing wood work instead of metal I felt real happy to be back at riveting.
Before getting to work I put all the nicely painted parts on a work bench to take a group photo:
That's the stuff that held me up so much. Anyway, back to page 23-03!
Most of the stuff that could be done before or without painting I had already done. Among them was countersinking those massive plates that will hold the rollbar structure. Somewhere in the forum I had read that when Van's was asking to countersink 5 holes they had marked six and the question was which one is the one that's not needed. Well, I read it and marked it and now I know that I misunderstood or the information was wrong. So, here's the photo that shows you on the left plate which one's are in fact the ones that need countersinking.
ok, look at the top row of rivets in the photo. The inner four holes have CS4-4 rivets in them, two have yet to be pulled. These are the ones that have to get countersunk. The one on the left outer edge is the one that doesn't have to be countersunk. Looks nicer, maybe, but certainly not necessary. The fifth hole that needs countersinking is - oops, forgot to do that yet - the second hole from the top on the left. If you just take one of the aluminum blocks that will get screwed onto the plate you'll immidiately see which holes need CS rivets and which don't.
The rest of the assembly was easy and without any incidents.
Support bracket in place and about to get riveted.
And that's the end of 23-03, well, as soon as I have countersunk the two forgotten holes ...
These two pages took me more than 41 hours. Ouch!
Sunday, March 27, 2011
Little Touch-Ups
Today was touch-up day. I found a few spots that needed touch-ups and I also had to respray the side supports of one seat back and the opposite side of a piece I had sprayed before. I also decided to spray the inner part of the vent doors without additional priming. The paint is adhering well, even to surfaces it is not at all intended to adhere to. Like stainless steel for example. I missed to tape a spot on the firewall and ended up with some paint on it. I had a real hard time getting it off and had to use MEK to get it off. I guess I was lucky it hadn't polymerized completely yet when I started rubbing. After 5 minutes it was finally off. I guess I could have easily painted the firewall if I had decided to do so.
No new photos today as the stuff practically looks like yesterday. Currently the parts are all in the shop and enjoying the space heater again. Tomorrow I'll be moving the fuselage back on the outside workbench and see if I can get some assembly done as well. I might have to postpone that though as I need to finish my tax work. Argh!
Saturday, March 26, 2011
Big One Done!
I feel much better now! All the anxiety about how to best spray that basic fuselage are now a moot point. I finished it and there's only one spot I have to touch up with tomorrow's batch of parts that get painted.
But let's start in the correct order. I finished the masking tape job in the morning.
I cleared out the paint booth and vacuumed out the dead bugs and some dust that had collected on the floor. I also put a 6' long folding table in there and covered it with a tarp. Underneath the tarp is mover's blanket to provide some cushion for the fuselage.
Then I had to move the fuselage into the paint booth. I thought I had measured it to require around 7' of space but I obviously hadn't taken into account that the fuselage might sit a bit tilted and therefore require more room than just the 7'. The paint booth was built using 8' long 2x4s which I think now to be too short to be comfortable. If you follow my lead consider using 10' long 2x4s to get a bit more room to move around the fuse!
I got it in however, but then needed to rely on the pressure from the fan to make the door plastic foil bulge to get around the thing. Not very comforting!
Spraying itself was simple and much easier than I thought. Although I didn't mix enough paint (I used 180 grams for part A) I was able to finish 3 good coats. On the last, third, coat I focused on the visible high stress areas, the foot area and the baggage area. It turned out to be enough paint everywhere and the finish is great. Only in one spot I had put some masking tape on where I shouldn't have but it's in the gap where the wing spars will sit and so a brush touch-up will be sufficient.
This is two hours after spraying and the masking tape is still on.
Same time but different angle.
Another two hours later I returned and removed the masking tape as the paint was "dry" to the touch. Then I moved it out of the booth and into the shop where it is easier to maintain the necessary temperature for the curing process.
I just hope the color turns out not to be too bright. On the paint chips I selected it from it looked two steps darker than it looks now....
Friday, March 25, 2011
Getting Ready for the Big One
Yesterday I did some little riveting work to complete the assembly of the seat backs with the piano hinges. It wasn't aenough work to create a separate post, so I just document it with today's blog entry.
The seat backs paint job turned out good except for one where the paint was a little light on the side support angles, so I will have to respray that this weekend.
Tonight I started cleaning and masking the canoe to get it ready for tomorrow morning's paint session. This will be the big one and I hope it'll turn as nice as the smaller parts I have sprayed so far. Sure would be nice.
I am almost done with the masking.
The only part left is the firewall that has to get completely covered. I will not paint it because as the name 'firewall' this could get really hot if a midair fire would occur and the paint could start to burn and emit gases worse than the fire at that point. Also, it's not really easy to paint stainless steel, nothing really sticks to it. So instead of creating a horribly looking, paint peeling death trap I just leave it as it is.
Besides finishing the masking I will also have to scruff the primer and clean the surface again before moving this canoe into the booth.
Wednesday, March 23, 2011
Paint Session Two Complete
Yeah, I know, the titles lack some creativity recently. If you want to suggest something better, go ahead and email me, I'm more than willing to consider something else. Dave always comes up with something thrilling...
So, I had my second paint session today and I am even more impressed now that I was able to repeat the results from the first session. I am usually good with something that I try the first time as I am very cautious and alert. This fades quickly once I succeeded and then I make my mistakes during subsequent runs as my mind is repetition mode but the knowledge hasn't really settled. It seems that this paint system is not so complicated after all. It was a little cooler today and I didn't mix so precisely as I did last time, exceeding a gram here and there. Still sprayed like the first time and turned out beautifully. I just moved the parts into the shop for overnight heating and saw a flawless finish.
I also got to rivet a little to feel some progress - although it was just 16 rivets to attach the piano hinge to the seat back support brackets.
So, here's the plan for the next days. Because there's nothing left to assemble before the fuselage is painted, I see to put the masking tape on and scruff the surfaces of the canoe before the weekend. Then on Saturday I hope to move the canoe into the paint booth and get the thing painted in the morning, to maximize the curing time at advantageous temperatures. I might have to put a space heater into the booth over night to keep the temperature high enough.
On Sunday I should be able to pull the canoe out of the paint booth and back on the work bench to get some assembly done. The side skins will go on next, so I should prep and prime them soon. This could be done during the week in the evenings. But maybe I'm getting ahead of myself with this planning. Let's see how the interior turns out...
Monday, March 21, 2011
Paint Results
Last night, before going to bed, I moved the parts out of the paint booth into the shop and turned on the heating to ensure it was warm enough over night to maintain the curing process. As I haven't had any experience with this paint yet I wanted to be on the safe side and rather overdo it than falling short and having to deal with a possible mess.
This morning I checked on the parts and turned the heating off. I am impressed with the results!
I'm really not a painter at all. I never did this before and I feel that my talent with a spray gun is more on the weak side (trying to be nice to myself here). However, the finish turned out to be great! There are a few areas where it's not so great and I remember that these are the ones where the primer came on a quite rough and couldn't get fully smoothed by scotchbritening (cool word, huh?) then either. It's not bad but significantly rougher than the surfaces where the primer was all smooth and almost shiny in finish (well, not shiny because it's a flat primer).
That confirms the saying that a good paint job roots in a good surface preparation. Whatever you mess up there cannot be fixed with the paint. Every effort you put in the surface prep will then show up in a better looking paint job.
Nothing new, but I guess I had to prove it.
Again, I am very happy with the results. The paint booth worked well and kept the contamination to a minimum. Only a handful of spots where some dirt particles got on the paint (probably stirred up from the floor) and I can totally live with it.
Now, if I had a really large paint booth, climate control and filtered ventilation, I would really do the exterior myself. I think the Stewart paint system is manageable by a paint newbie (to avoid the term 'dummy') like me and, boy, you gotta love that easy water-and-soap cleanup!!!
Sunday, March 20, 2011
Paint Session One Completed
Whew, that went fast! I got up early to catch the first light and wait for the temperatures to rise to 65 degrees which is the minimu for application. Then you should keep up 70 degrees for 12 hours to allow the paint to cure. Well, were else could you do that than in Tucson in Spring time? We got to 67 degrees at 9:30 am and I got ready to paint at 10:15 am. This should allow the paint to cure before the night temperatures cool the paint booth down as well.
Not many photos yet and the paint is still not completely dry to the touch yet. I stopped spraying a little after 11 am, so that's within tolerances.
This time I took the safety gear real serious. This is Polyurethane after all, despite the low VOC and all. The paint filter pads in front of the charcoal filters were soaked after the job and will have to be replaced for the next run I believe.
Peeking in through the plastic curtain. It looks much better to the human eye but I have to say that I am quite happy with the finish so far. I just hope it cures like this. Oh, and I did not use my HF gun on the paint job but an Italian AOM K1/ SX which I had bought (but not yet used) before becoming so happy with the latest HF gun. The reason why I didn't want to shoot the paint with it was that the last primer session caused a lot of very fine dust in the booth and I wanted to see if the AOM would not do that. Bingo! It delivered a fine but not too fine mist with a minimum of back spray and almost no floating mist. My paint coverall was almost like new when I got out of the booth after an hour.
Downside? Oh, well, the price tag is way above anything you could buy from HF. Works like a charm though!
I'm not quite done with painting the parts yet. The seat backs' other side will have to get a treatment and I have 3 larger primed parts sitting in the shop that didn't make it into the paint booth today. I might throw a second session in tomorrow morning if I can ...
Saturday, March 19, 2011
And a Little Closer to Painting
Today I worked on a few different assembly jobs, some primer touchups and surface prepping for painting. The assembly mainly focussed on Section 26 which is the seat backs. I assembled them with painting in mind, so I left all the piano hinges off except for the bottom one as this needed to be in place. I will tape this one before painting tomorrow.
Putting it together for the match drilling of these two mysterious bottm holes that get screws instead of rivets although they don't really hold anything. I'm wondering if anybody found out why they get screws and not just rivets ...
One seat back done. The second one went together just as nicely and without any problems. I also had to prep the surfaces of most of the parts I had primed before. Since day one I seem to have this problem of spraying too lightly and then adding additional coatings too late and just as lightly again. The result is a very rough surface of the primer. I smoothened that a bit by "sanding" it with an SB pad. That works quite well and is less dirty than sand paper. Now the parts that are about to get paint are in better shape than before. Let's hope I do better with the actual paint!
These parts are getting painted in a second session as they are too complicated for my first run.
This is what I have already set up in the paint booth, so I can start early in the AM tomorrow and get the rest of the warm day to cure the paint.
The other assembly I worked on was the vent doors.
They took me half an hour to put together, mainly because all the holes were quite tight and needed match drilling with a #40 bit as well as countersinking.
Thursday, March 17, 2011
Safety Notice
Van's sent me an email earlier today informing me about a problem with some welds on a critical part. Critical as it would affect the control of the aileron connected to that part if it broke. The part number is WD1215-L/R-PC and it is the torque arm that makes the connection between the fuselage internal actuators and the flaperon actuator tab. This is the connection that uses nylon brackets as a brace around the aluminum actuator arm on the flaperon so the wing can be removed easily. A failure in this part could certainly lead to a fatal accident and as I hadn't gotten to the stage yet where I had to use these parts, it was easy to check them right away.
Locating them was a bit trickier until I found out that they were part of the Finish Kit. All that stuff still sits in the crate it came in, so all I had to do was search in there. No problem found on the welds. They don't just look good, I also squeezed the flanges that were weld to the tube quite hard to make sure the weld wouldn't give in with a little force applied. That's about as complex of a test as I can do on this part.
I also checked the quality of the priming job I did yesterday and I found some visible surfaces that showed slight runs from my heavy coating. I sanded those runs and will have to spray these again. I also found out that I have to spray the longerons now as the last match-drilling on them will be done when they are already partially installed. To reduce the overspray on the longerons and for the small touch up areas I just sanded, I'll use my little detailer HVLP gun that came with the bigger one that gave me so much trouble. The detailer gun though worked like a charm and it will certainly have a smaller and finer fan than my usual gun.
Wednesday, March 16, 2011
Paint Booth in Action
So I really got to spray some primer after work today. I was working through sunset into the night and the lighting is really superb. What I was not really prepared for is the amount of dust building up in the booth. The air throughput is not high enough to transport all the dried up paint mist out of the booth quickly and if you keep on spraying the booth fills up with quite some some paint mist that finally falls out as dust. I covered from head to toe. Fortunately this Stewart stuff is not too hazardous and washes off easily with water and soap.
Getting ready for spraying.
Look how the fan pressurizes the booth. The "door" is bulging outwards and the air is blowing through the gap. I left it open wider to allow the paint to dry quicker.
After 3 hours I had this stacked up in the shop for the final drying. I have to adjust the paint gun a little bit. It appears that spraying in a booth where the paint really hits the object you're aiming at applies more paint than outdoors where you always have a bit of the paint mist diverted by wind. So my layers where on the heavy side.
Some of these parts I primed today will also have to be painted. It's so long ago that I prepared these parts that I forgot by now and will have to look up which will get painted before assembly, after assembly or not at all.
Tuesday, March 15, 2011
Paint Booth Completed!
Finally! I put the top on and did a few finishing touches - mainly to reinforce the stapling in the 4 mil plastic foil preparing for the upcoming breezy days. Yes, that's right. More wind is coming through the next days. hard to believe as we should long be in nice spring weather here in Tucson.
and a look inside ...
I got everything ready to start spraying but I didn't do it tonight as I had to clean the surfaces again after they had been sitting in the shop for more than a week since prepping.
and a look inside ...
I got everything ready to start spraying but I didn't do it tonight as I had to clean the surfaces again after they had been sitting in the shop for more than a week since prepping.
Monday, March 14, 2011
Paint Booth Almost Finished
Sunday, March 13, 2011
Paint Booth Almost Covered
I couldn't completely finish the job of sheeting the paint booth with the plastic as I intended to do because when getting up this morning I found 3 aggressive stray dogs trapped in our backyard. I felt it was irresponsible to just open the gates and let them run as they were so agitated that I was worried to let them loose and them maybe hurting somebody out there. Dealing with the animal control people took a while and I lost that time to finish the booth.
I managed to cover 3 of 5 sides, so tomorrow evening I probably to the curtain overlap on the access side and then I just have to cover the top and then put a floor cover in (that would be side 6)!
And I have to cover the fan with a furnace filter, too.
After "losing" all this time building the paint booth, I noticed something that will help alleviate the time impact this side project will have on the RV-12 build. Besides the independence it will give me from the wind situation on weekends, the lighting test I ran at night, showed that I might be able to spray in the dark as well! This evaluation is pending a second test with the top plastic cover on to see how much this will dampen the light inside the booth. Without the plastic on it is a great light for painting...
Saturday, March 12, 2011
Paint Booth Frame Finished
I finished the wood frame and the detailing for the paint booth. Getting the fan was a bit of an odyssey as HF didn't have it in stock (like with so many things I recently wanted to buy) and that was actually good. It turned out that Lowe's has the very same box fan in 20" for $10 less than HF. This also meant another drive to Lowe's though which took some time.
The little exhaust window is covered with an old stretched out T-shirt cloth. I hope it will filter the paint out and let enough air through so the air would try to find other exits.
Thursday, March 10, 2011
Paint Booth Almost Finished
I got a few more screws into my paint booth tonight. I was all prepared to add a lot of stiffeners but it turned out that after adding the missing two struts and after screwing the top tight the stability is more than adequate. This will make it easier to take it apart after the job is done, too.
Tomorrow I will try to get the lights, the fan and the filter, so I can maybe complete the wood work in the evening or on Saturday.
Wednesday, March 9, 2011
Building a Paint Booth
I've decided to build a paint booth for spraying the interior and the last parts that will form the fuselage. It's relatively late into the build process but now I am going to spray the parts that I will look at quite frequently and so I don't want to mess this up.
Another reason to avoid it for so long is that I won't have a car port for my truck for as long as the booth will stay. Which means I am trying to make this a short term thing and remove i as soon as I am done with the interior. As it is too small for the wings or the connected fuselage there are no second thoughts about using this booth for all the painting. I still think I am going to have a professional do this.
Stacking the wood. I actually removed the 4 2x4s that are readily lying there to get connected and swept the floor first. Followed by taping down some 4mil plastic tarp. This is just as a backup layer. I will also add another one inside the booth when I am putting all the plastic sheeting on.
Getting closer! The top and the bottom are built, and the 4 vertical struts are in place and positioned. Everything is made from 2x4s so far. The layout is 8x8' and 78" tall.
Whew, done for the day. The little nubs on the top of each strut is supposed to hold the top in place while I am putting the screws in. It's probably not going to be very stable and I have already wood here to add some stability to it but this will have to get fitted, so I need the top to be in place before I can do this.
Ah, my wife just came home and helped me lifting the top onto the base structure. It worked perfectly and the nubs are really helpful keeping the top where it's supposed to be. My back's too achy to put screws in right now, so this will have to wait until tomorrow evening.
Sunday, March 6, 2011
Another Windy Weekend
For weeks now I am waiting for that weekend that would allow me to prime and paint some parts that are stacking up in the shop. Today I did nothing but cutting, deburring and prepping parts that I want to prime and paint some of them but the weather again did not allow me to go ahead and at least prime them. Way too windy. This is getting boring!
For now it looks like Wednesday might be a calm day and I am considering taking the morning off to get at least the priming job done. If I am lucky one of the weekend days then might allow for some paint to get shot (trying to think positive!).
Here are the prepped parts sitting on a platter.
For now it looks like Wednesday might be a calm day and I am considering taking the morning off to get at least the priming job done. If I am lucky one of the weekend days then might allow for some paint to get shot (trying to think positive!).
Here are the prepped parts sitting on a platter.
Subscribe to:
Posts (Atom)