The day in the shop started a bit before noon and I finished installing the static system which I left early the day before. So, the silicone tubing got installed and sealed/glued to the static ports with RTV (which I had to get at Checker Autoparts before I could start with this job as I didn't have any). Everything went fine with this and installed smoothly.

After tucking in the wires and static line with cable ties, it was on to adding the shoulder skins. I started with the left side and it went on without any hesitation. All the holes lined up just fine and little force was needed to bent it in shape while setting the clecos.


It was about then that I noticed an upcoming problem. Please look at how many clecos are set on the left shoulder skin and notice that the tail hadn't had any yet.

OK. Now follow my eyes as I am about to grab the next cleco to set:

Aha!!! I assume you see the problem. This is what is left for finishing clecoing the left side and doing the complete right side which isn't even on yet.
At this point I realized with a hint of sadness that I wouldn't be able to finish the shoulder skins today. Interestingly I had already ordered 200 additional clecos a few days ago as I was expecting to run short during the upcoming wing assembly. I did definitely not expect to run out during the tail cone.
In case you're wondering about the number of clecos I started with. I bought the Avery toolkit which contains the amount of copper clecos Van's listed on their page describing the required tools for the 12. The number is 350. Now, unless you're willing to allow the skins to not sit tightly on each other before starting riveting (and I am NOT) you will not have enough clecos for this step I am working on right now.
I don't want to be too scientific and determine the exact amount I would have needed but I guess that another 200 is on the safe side and would get this job done with skins perfectly aligned and controlled.
Well, I overcame this little episode of frustration - the ordered clecos probably arrive on Monday or Tuesday - and went on to finish what I could do without attaching the right skin.
This happened to the the installation of the left bushing bracket which will support the control cable for the rudder on the left side. This has to be clecoed match drilled, removed, deburred and put back in place to rivet it to the skin. Here's the result with the snap bushing installed. I actually did not need to use the 12" drill bit that was part of the toolkit in this step, although it is suggested in the manual. Maybe on the right side...

Then it was on to attach the right skin with was left of the clecos. I did remove a few from heavily clecoed areas that seem to have settled a bit since I installed them and therefore didn't need that much support for now.

This was pretty good. On the tail I ran out though. And so I didn't want to install the snap bushing bracket here as it provides a little bit of support for the heavily bent skin and without being clecoed and formed to the aft bulkhead I am afraid to put unnecessary tension on the skin. And it is easy to do once I get the missing clecos.

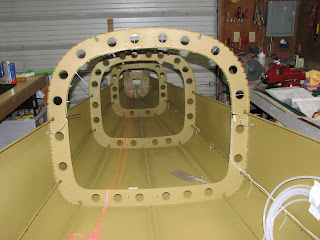
This left me only to admire the look of the fast forming abyss when looking from the virtual cockpit into the tail cone.
Breathtaking, isn't it? I am now 56 hours into the tail cone assembly.


No comments:
Post a Comment